8.26.2014

toddler meals | week 4

Welcome to Week 4 of my Fall series all about Toddler Meals! With a curious 15-month-old on my hands who is always hungry & on the move, our days are busy! As an RN turned Stay at Home Mom, my goal is to create balanced meals that are not only easy to prepare and serve, but nutritionally sound and delicious as well! I focus on meals that are simple with minimal ingredients and that can be prepared in 10-15 minutes. Each week I offer three meal ideas & one simple snack. You can find each of the previous week's meals in the links below!


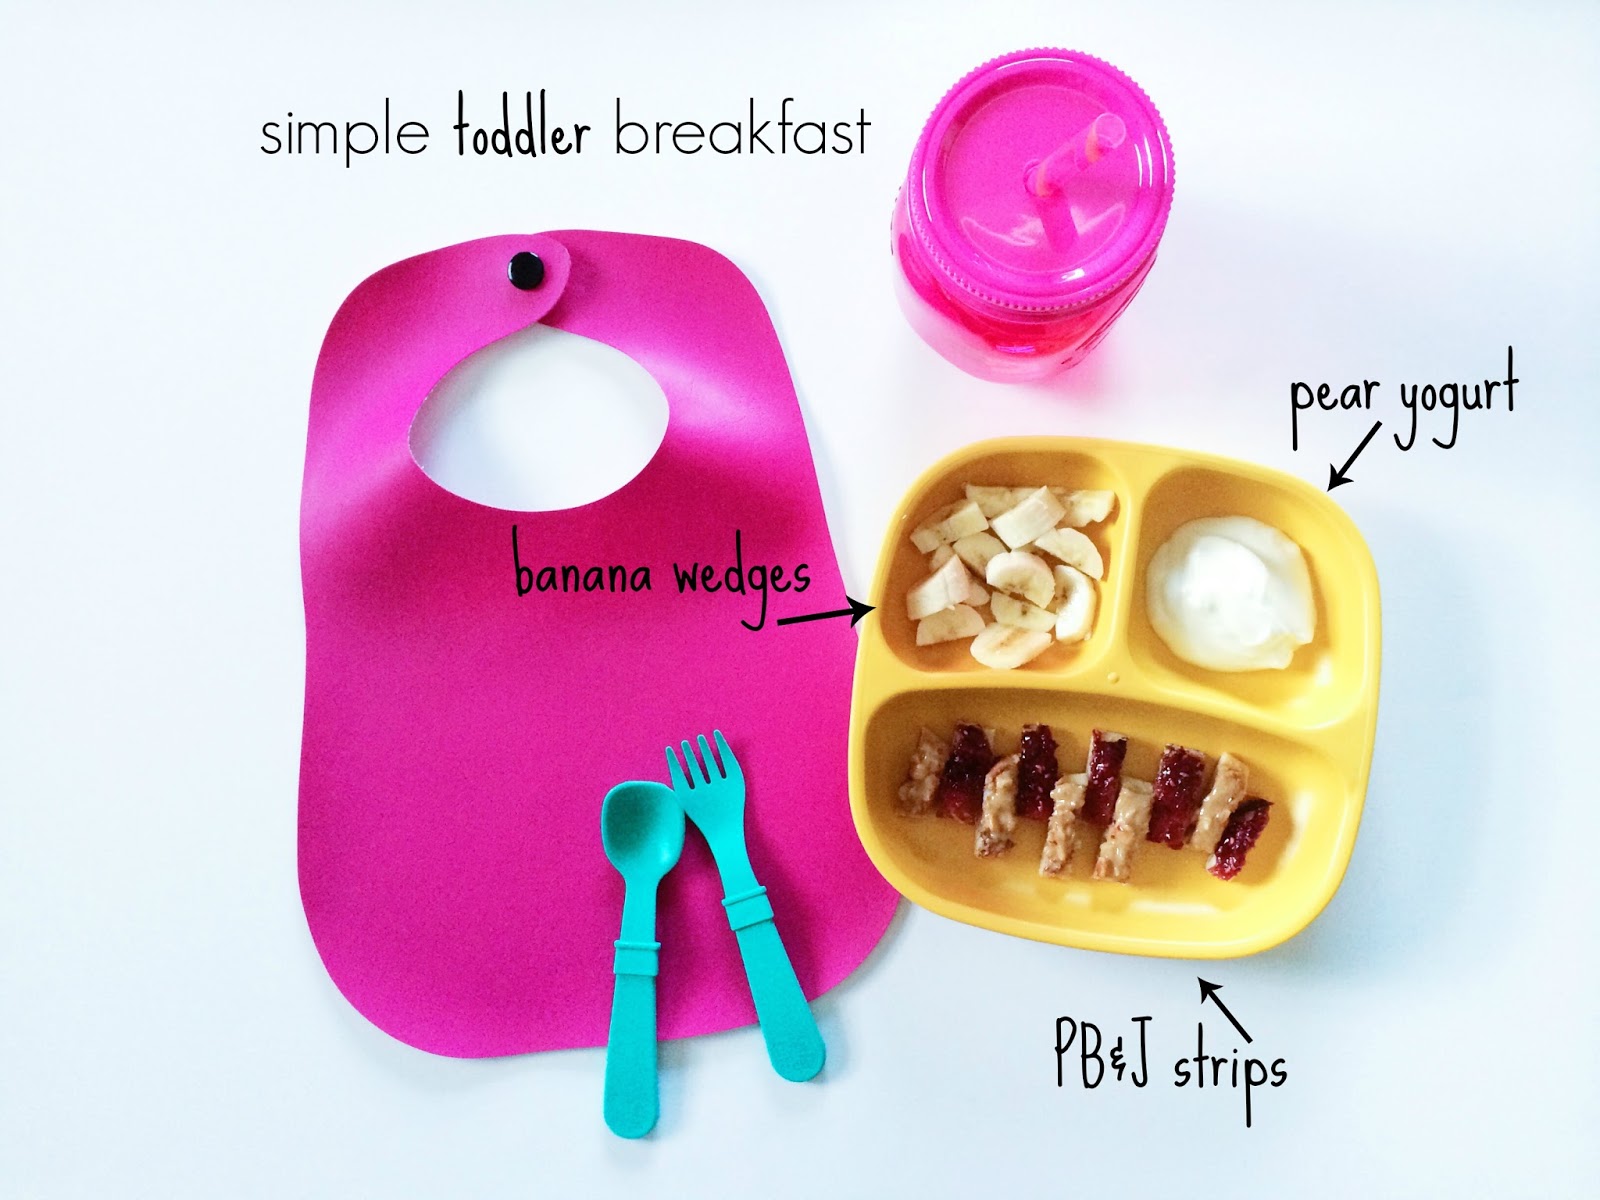
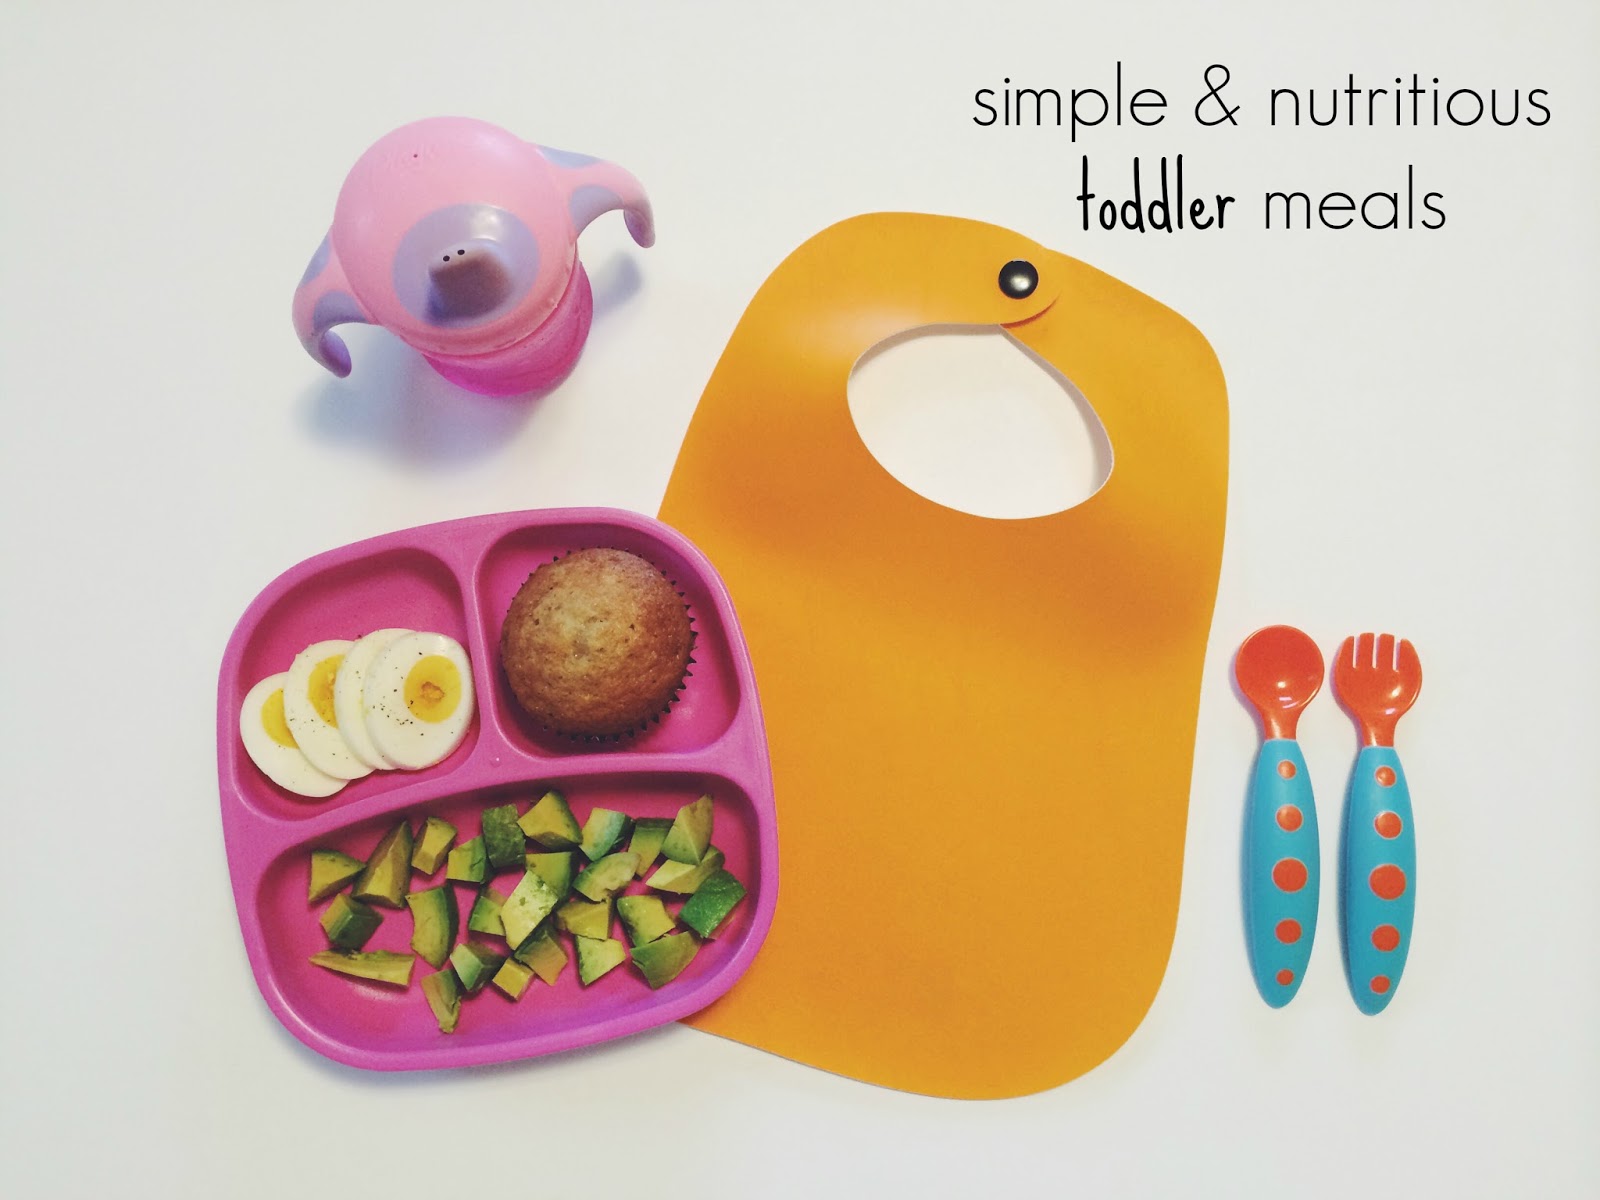
breakfast || omelette wedges, diced avocado & peach yogurt

+ Olivia loves eggs! They are one of her favorite foods and we eat them almost every day. I am always looking for creative ways to amp them up and keep them exciting. One way I love to do that is by creating a mini omelette and filling it with different ingredients that we have on hand. Olivia's favorite? Cheese of course! +


the how to ||
      » Cut a ripe avocado in half and scoop out one side; dice into appropriate sized pieces
      » Serve your child's favorite yogurt [we love YoBaby & YoToddler by Stonyfield Farm and I serve half a container at meals instead of the full container]
      » Scramble one whole egg in a bowl; heat avocado oil in a small frying pan; once warm, pour egg into pan so that it covers the pan completely; cook 1-2 minutes and add your child's favorite cheese onto half of the egg; fold the other half over the top and let cook another 1-2 minutes; flip the omelette and finish cooking then cut into wedges if your child can feed him/herself or into small bite-sized pieces for a younger child; let cool slightly before serving

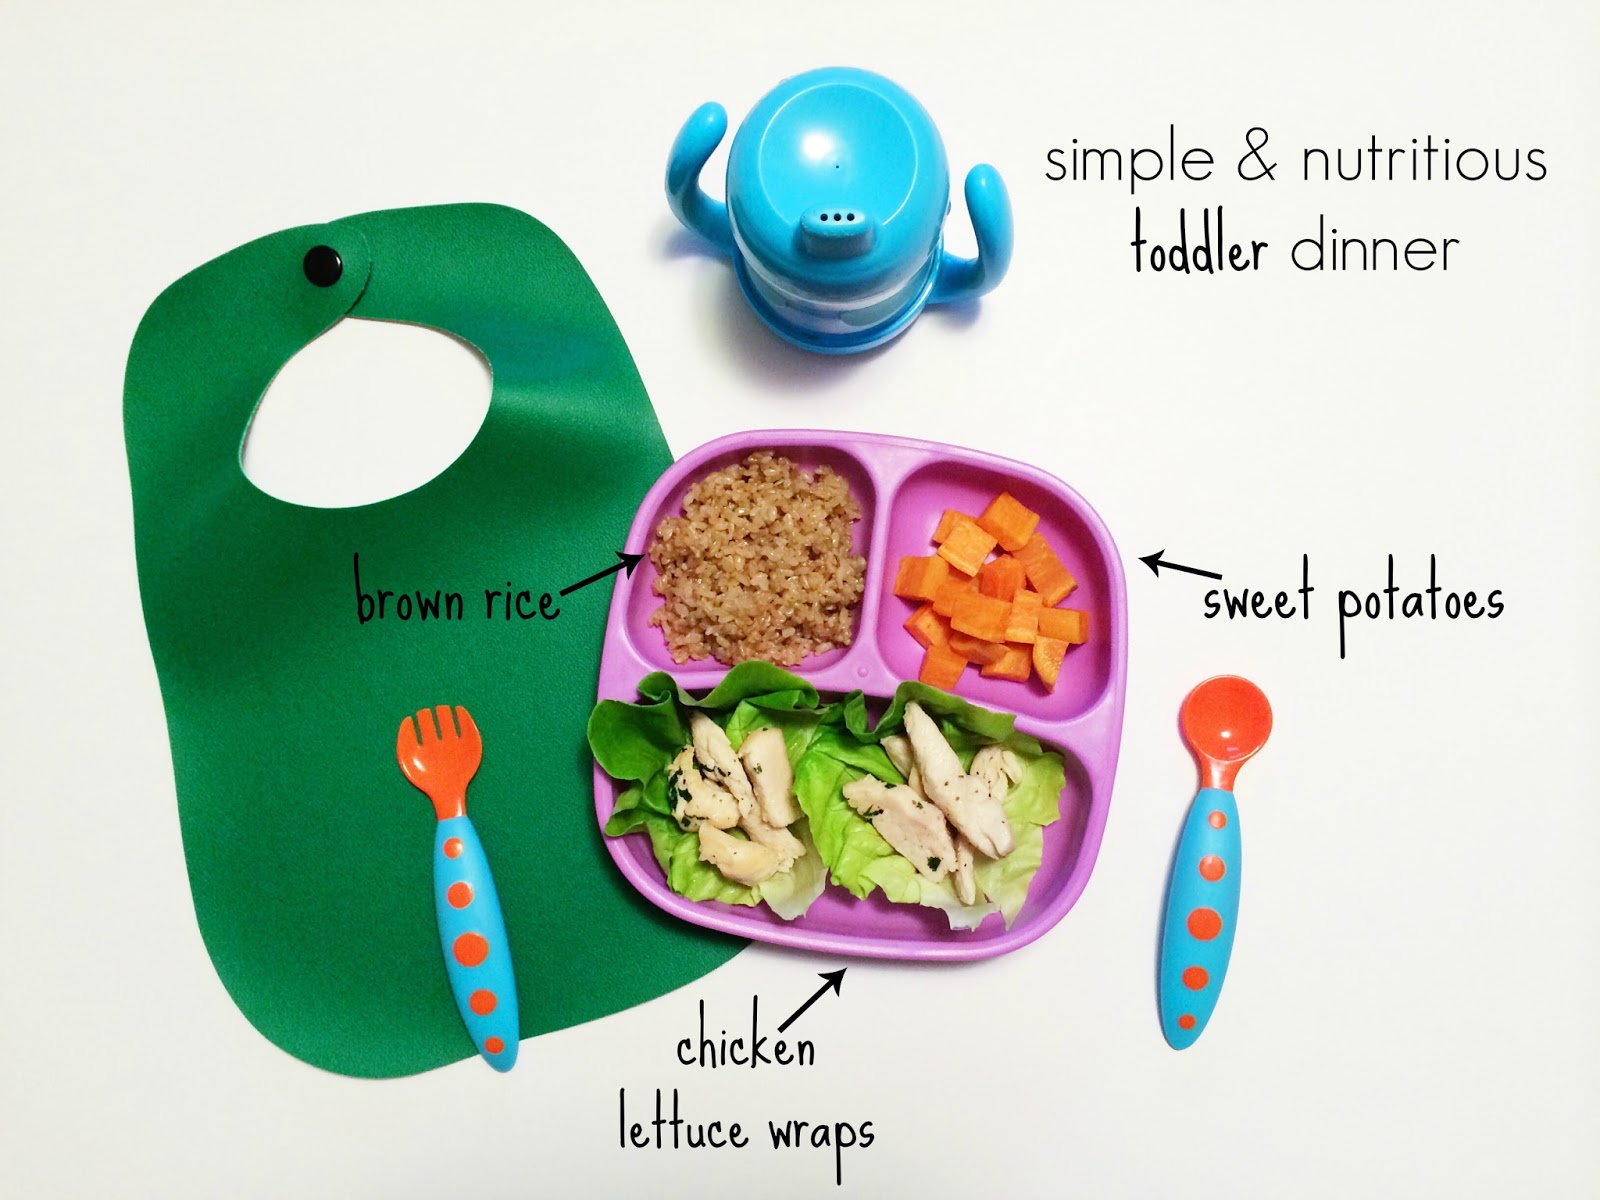
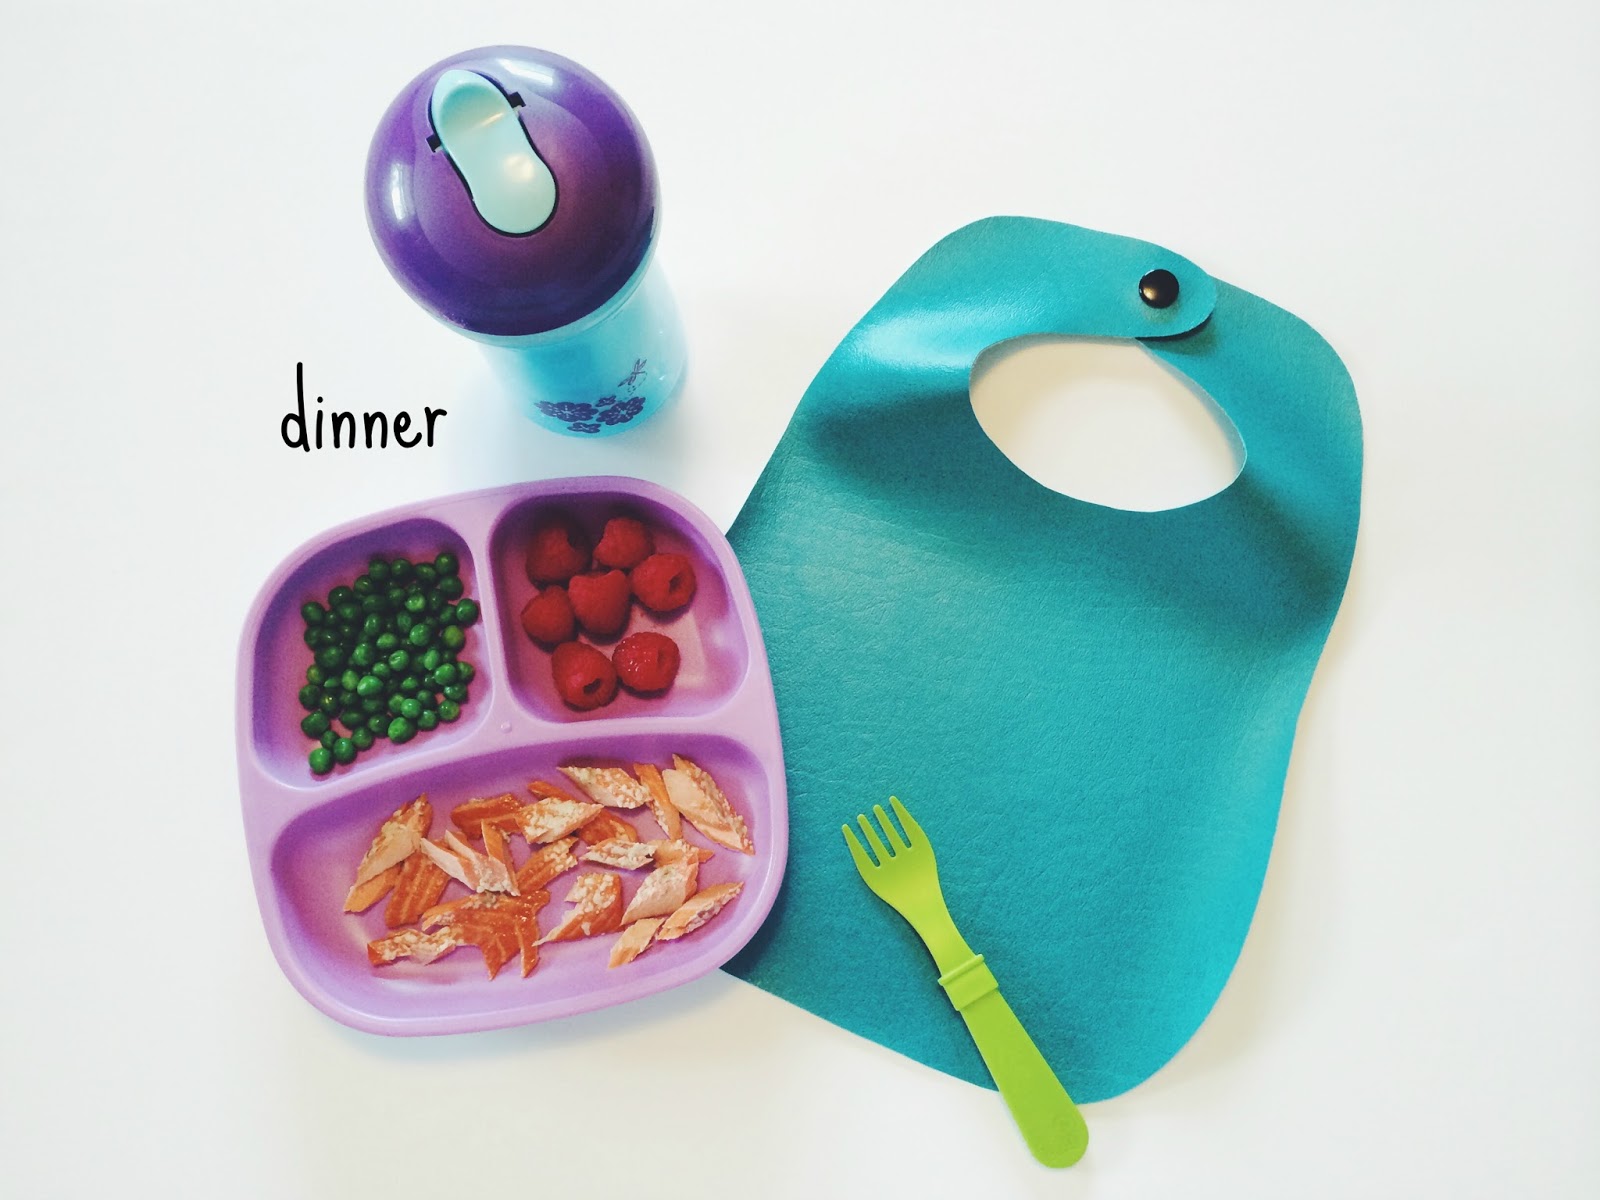
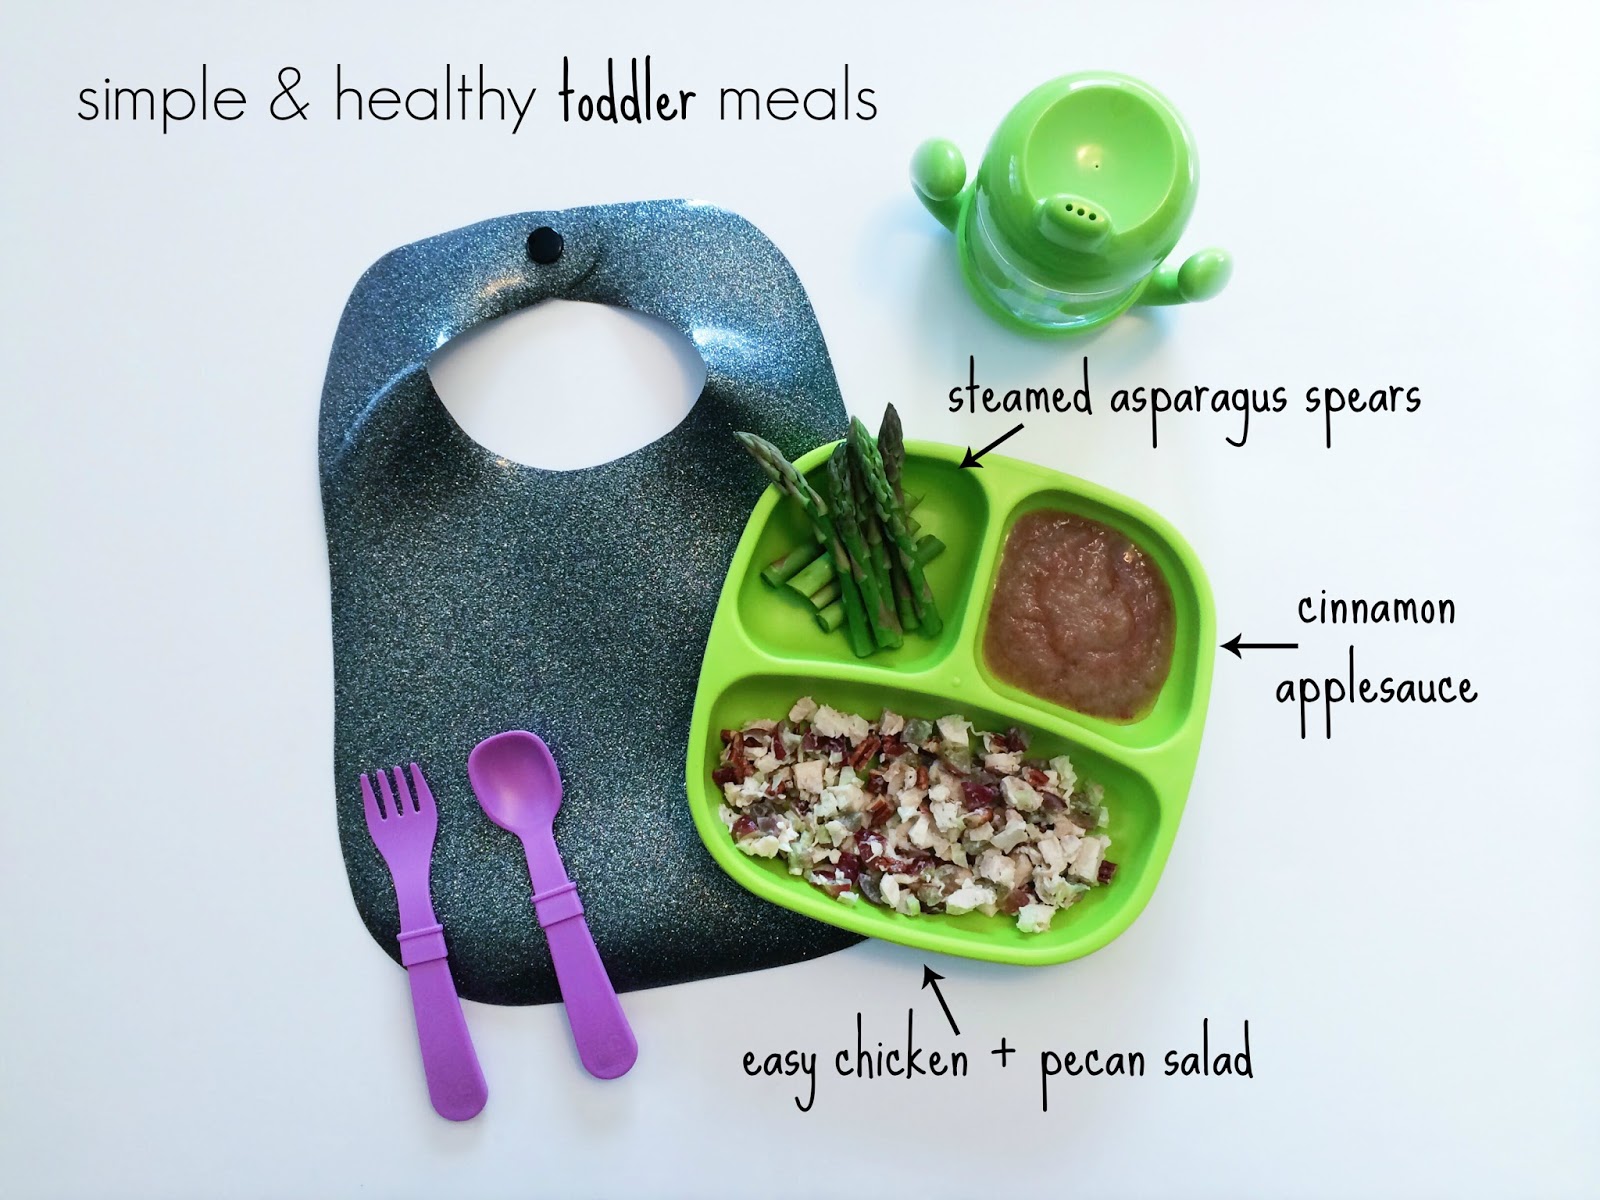
lunch || simple chicken salad, steamed asparagus & cinnamon applesauce


the how to ||
      » Make or buy your child's favorite applesauce // We get ours from a local orchard each Fall and all it has is apples in it without any added sugar [super important!]; I keep it frozen in small batches until I'm ready to use it and then add cinnamon just before serving
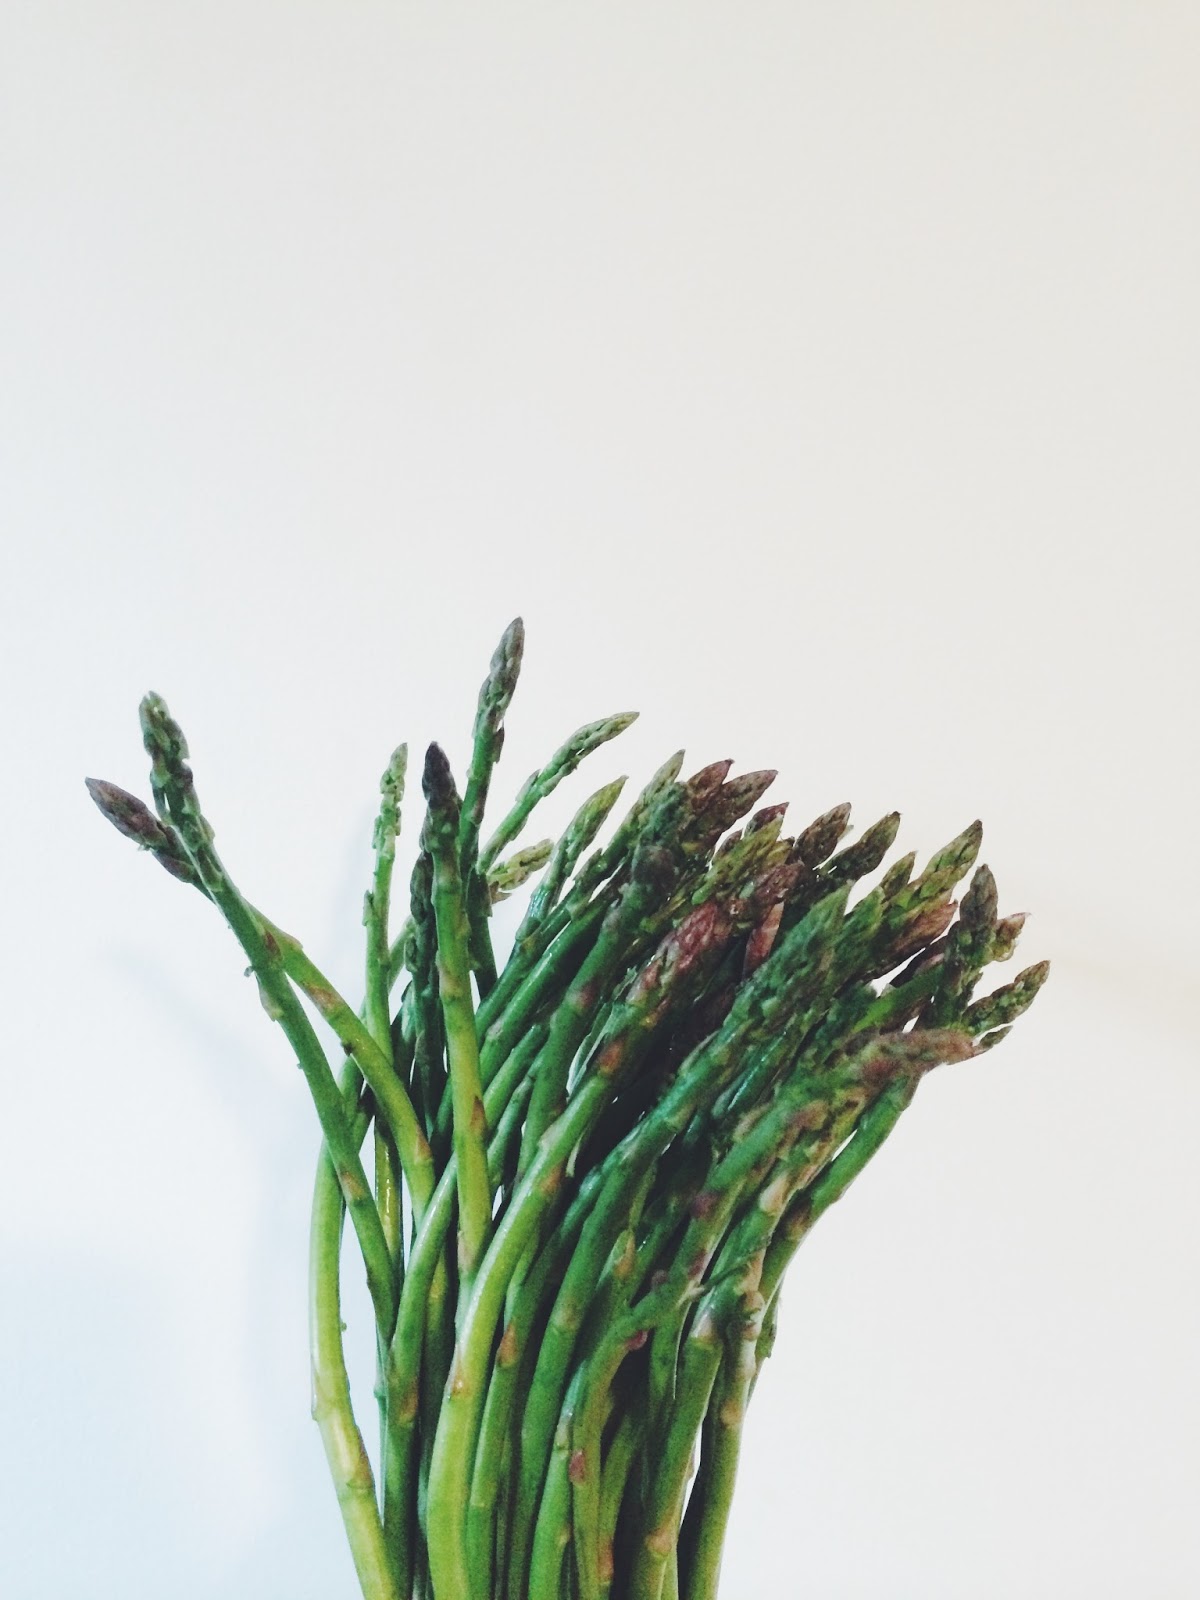
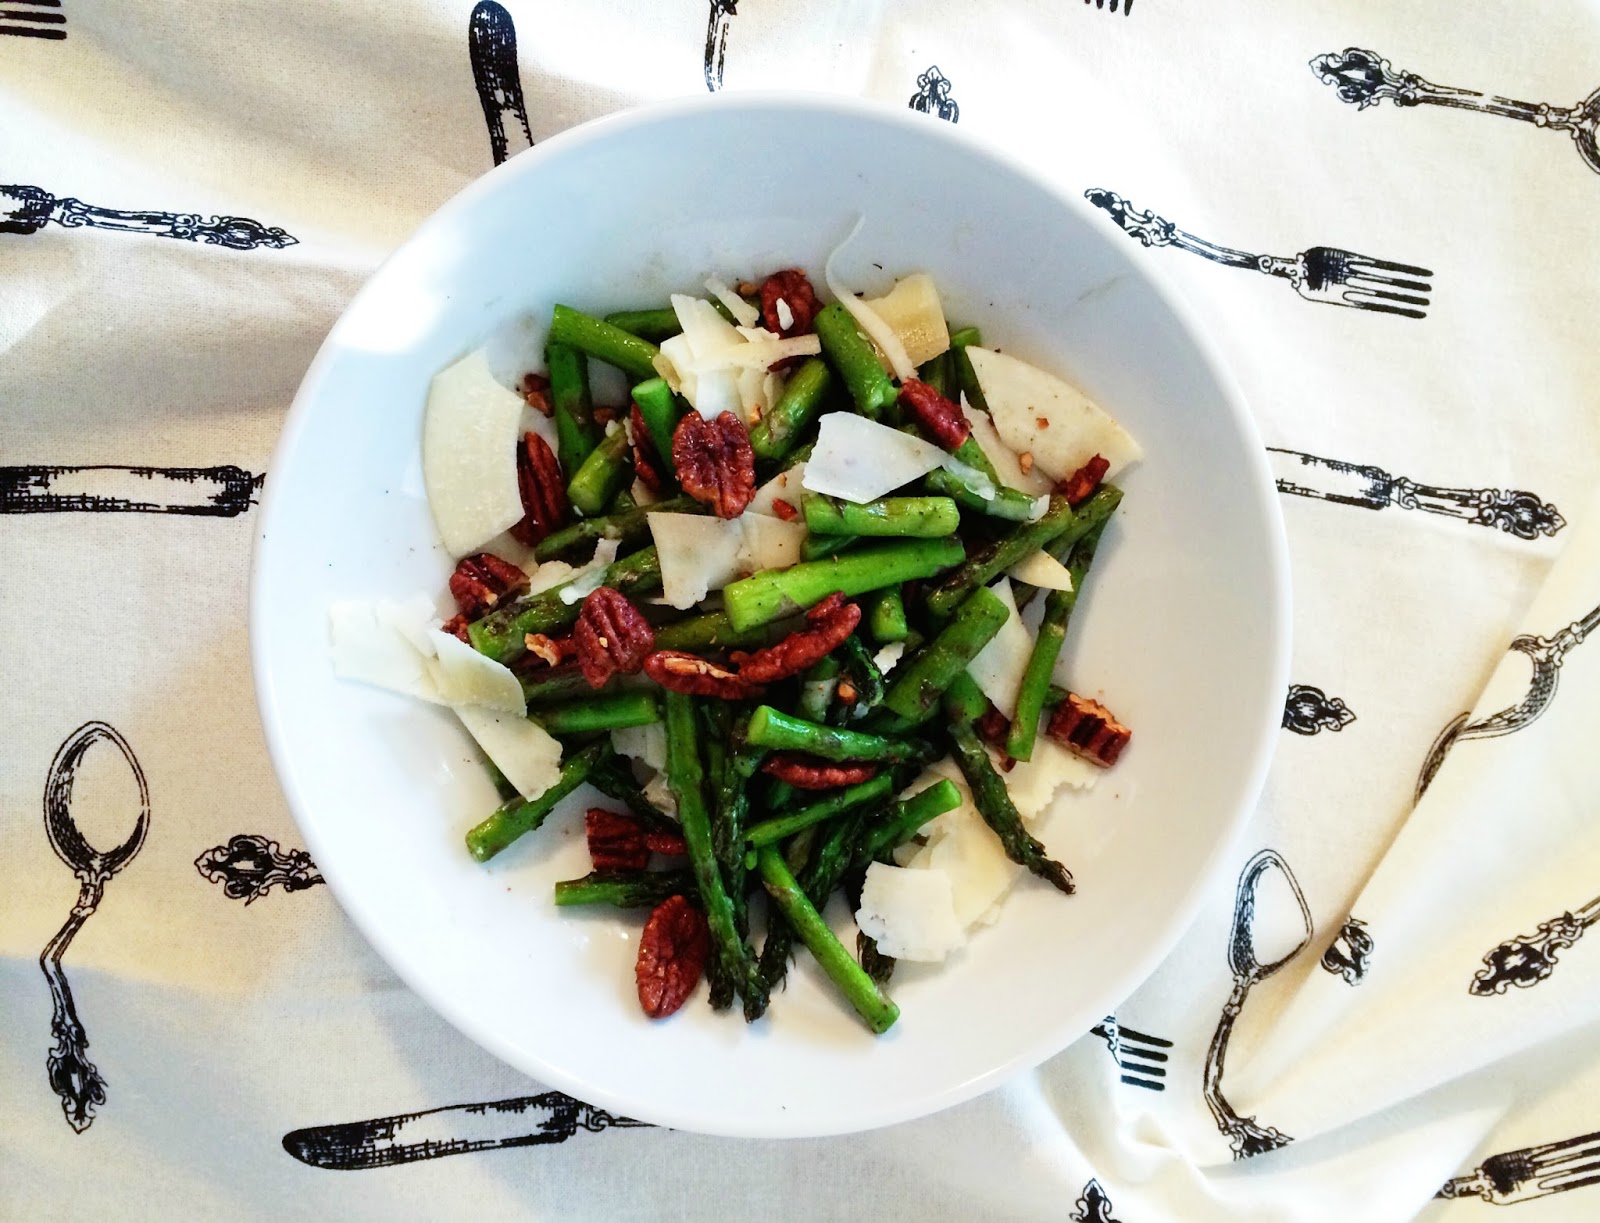
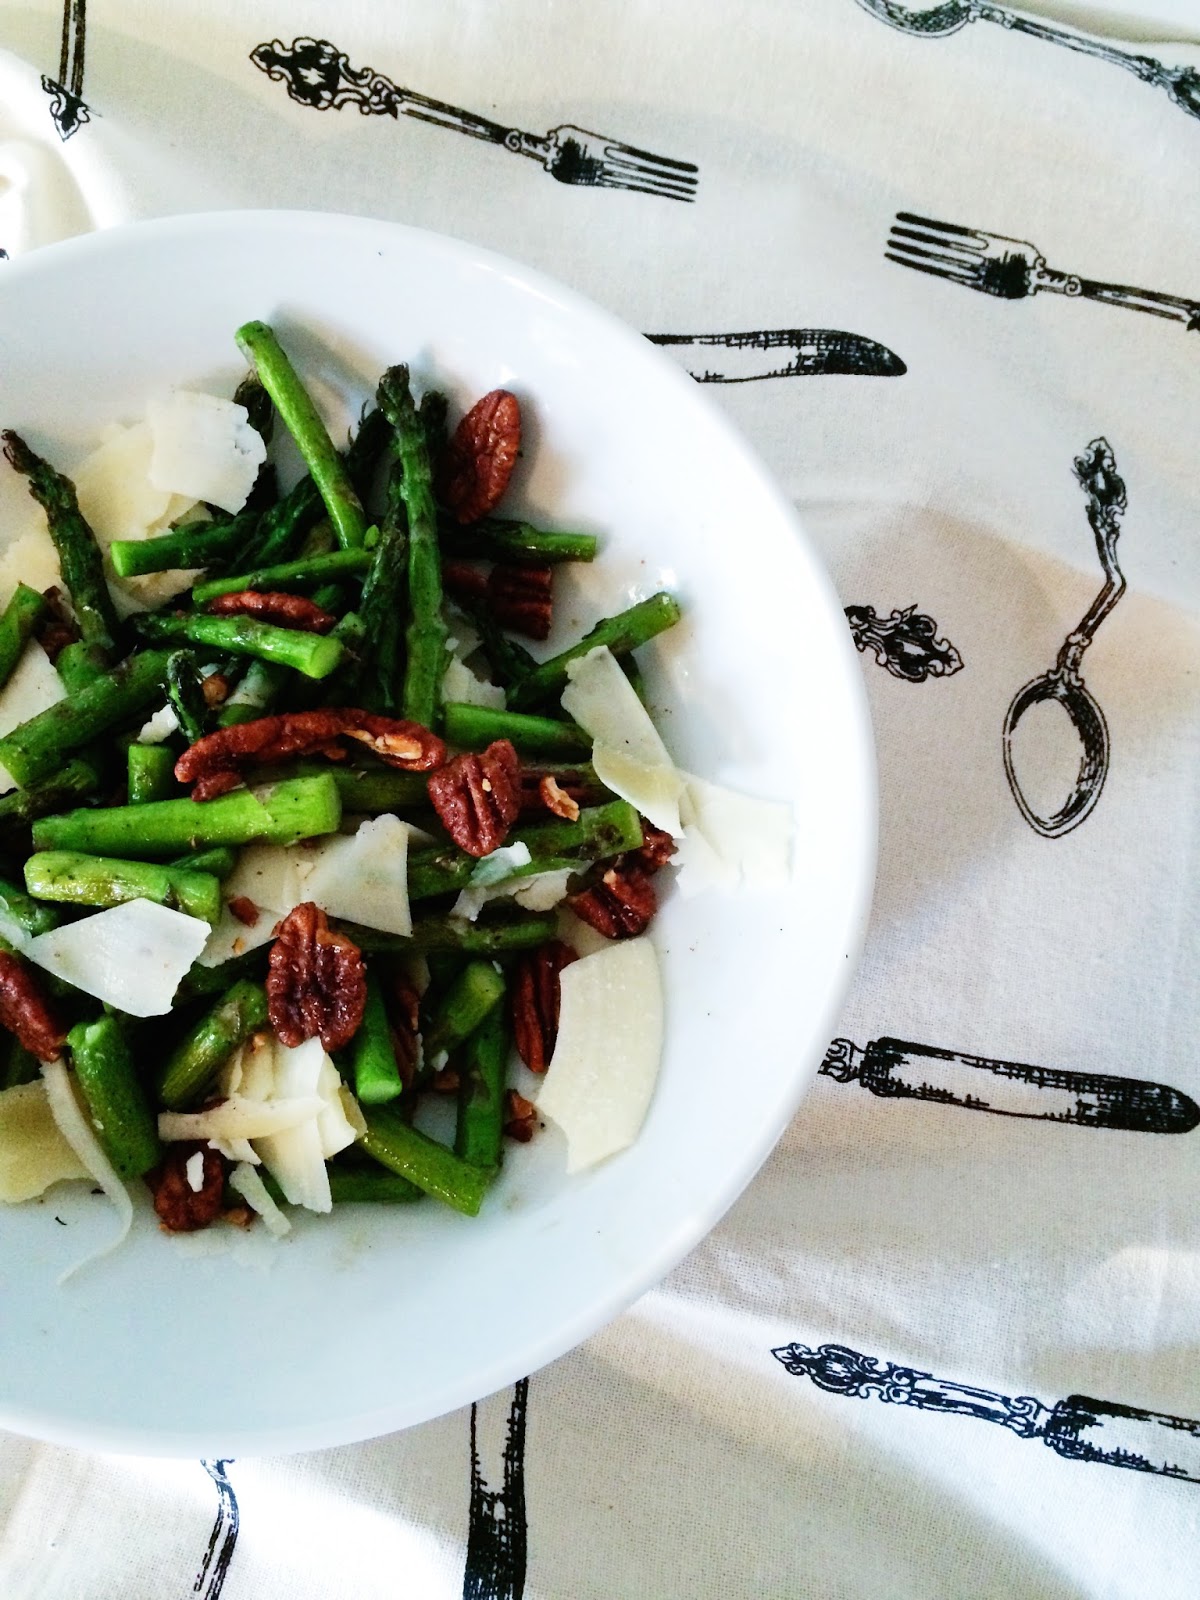
      » Steam asparagus and cut it into age-appropriate sized pieces; Olivia loves to hold onto the spears at this size and take a bite out of them but you can steam them and then dice much smaller depending on your child's age and self-feeding ability
      » To make the chicken salad: Grill or Boil boneless skinless chicken breasts in chicken broth until cooked through [approximately 9-12 minutes depending on heat level and thickness of breast]finely mince celery and raw pecans; cut both chicken and grapes into tiny bites; toss lightly in a high quality [short ingredient list!] mayo / Our favorite is Just Mayo // You can also omit the pecans altogether or swap them for cashews [Be sure your child is at least 1 year of age before including nuts in this recipe]

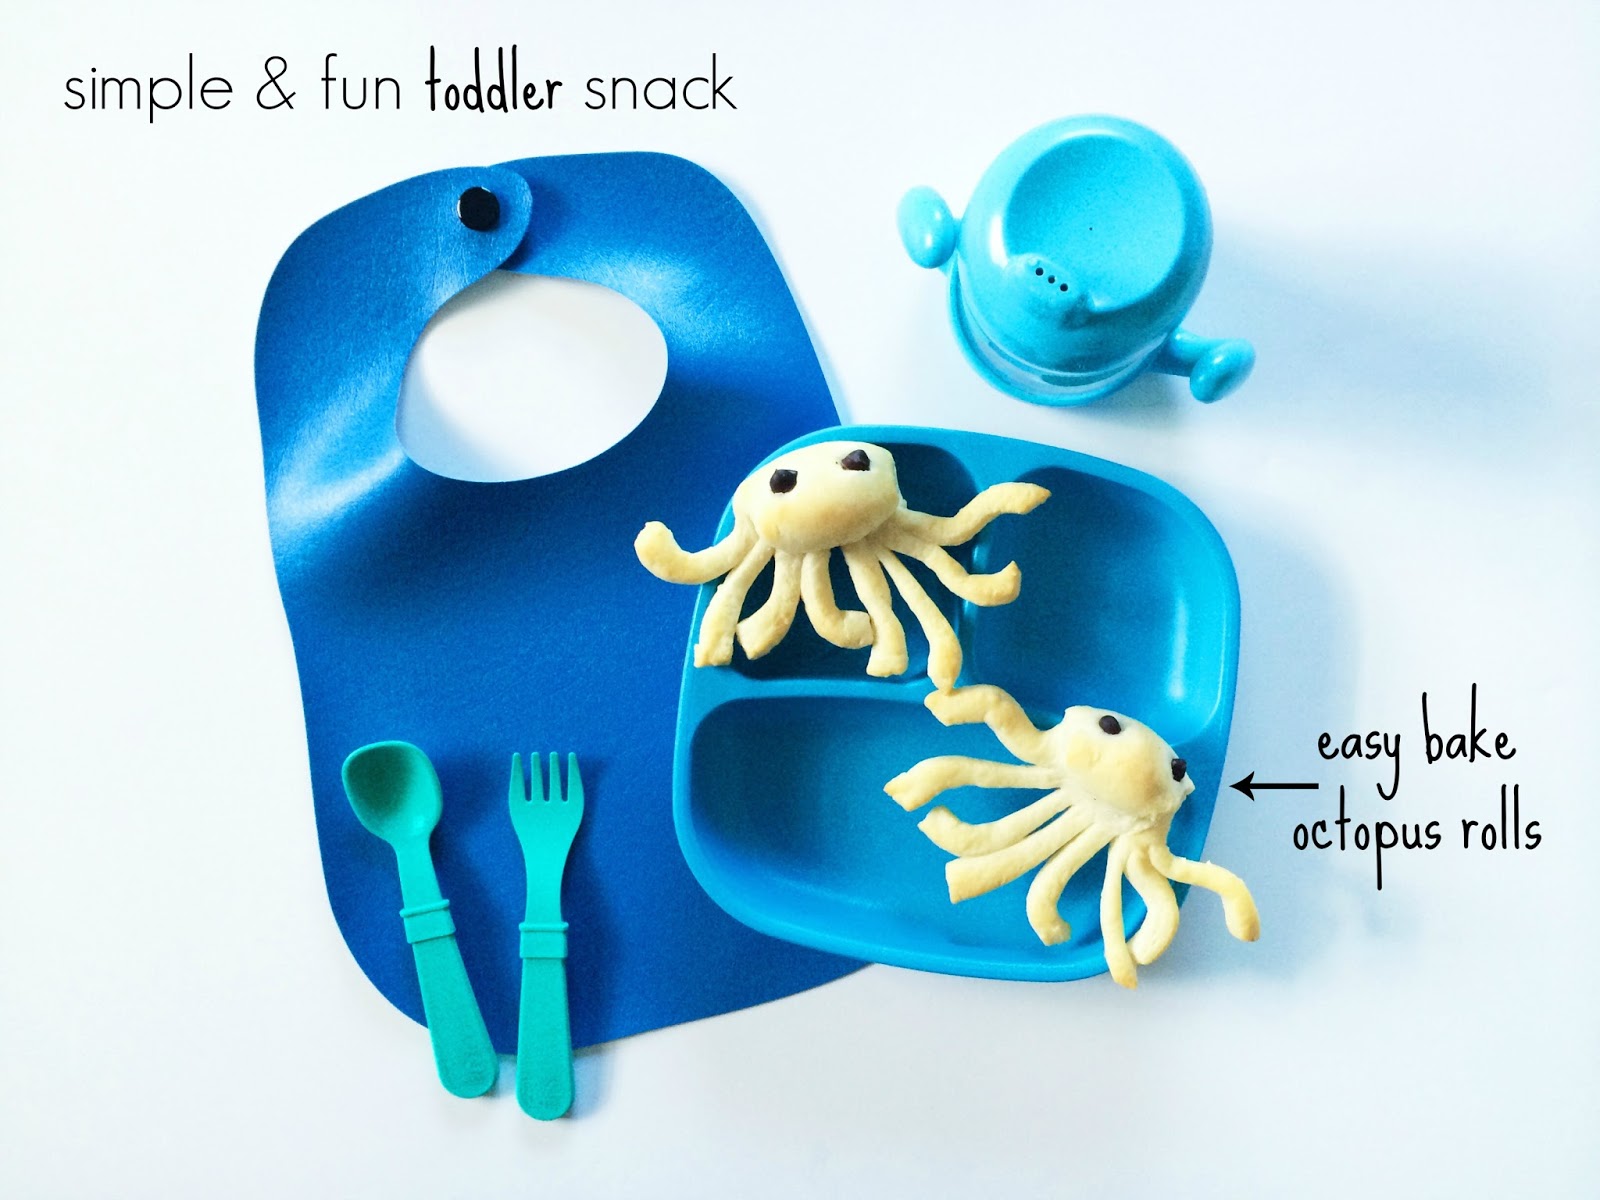
snack || easy bake octopus rolls 

+ This is a super simple snack that can be made in less than 15 minutes and is definitely one that your toddler will have fun eating. Made with crescent roll dough and baked for about 12 minutes, add butter or jam to these for an afternoon snack or pair them alongside some turkey & cheese for a heartier snack. Depending on your child's age, you can cut them into tiny pieces for little fingers +


the how to ||
      » Take a single crescent roll and lay it flat on a cutting board; using a kitchen shears, cut the shortest end of the triangle  into 8 3-inch strips [make 7 total cuts] 
      » Roll the remaining dough from the top onto itself to form the head/body and shape each of the legs as desired
      » Bake on a parchment-paper lined baking sheet for 10-12 minutes at 350 degrees or until lightly golden brown
     » As soon as you remove them from the oven, add octopus eyes: use a black bean cut in half for each eye or a tiny piece of a black olive; you could even use a raisin! Get creative and use what you've got!

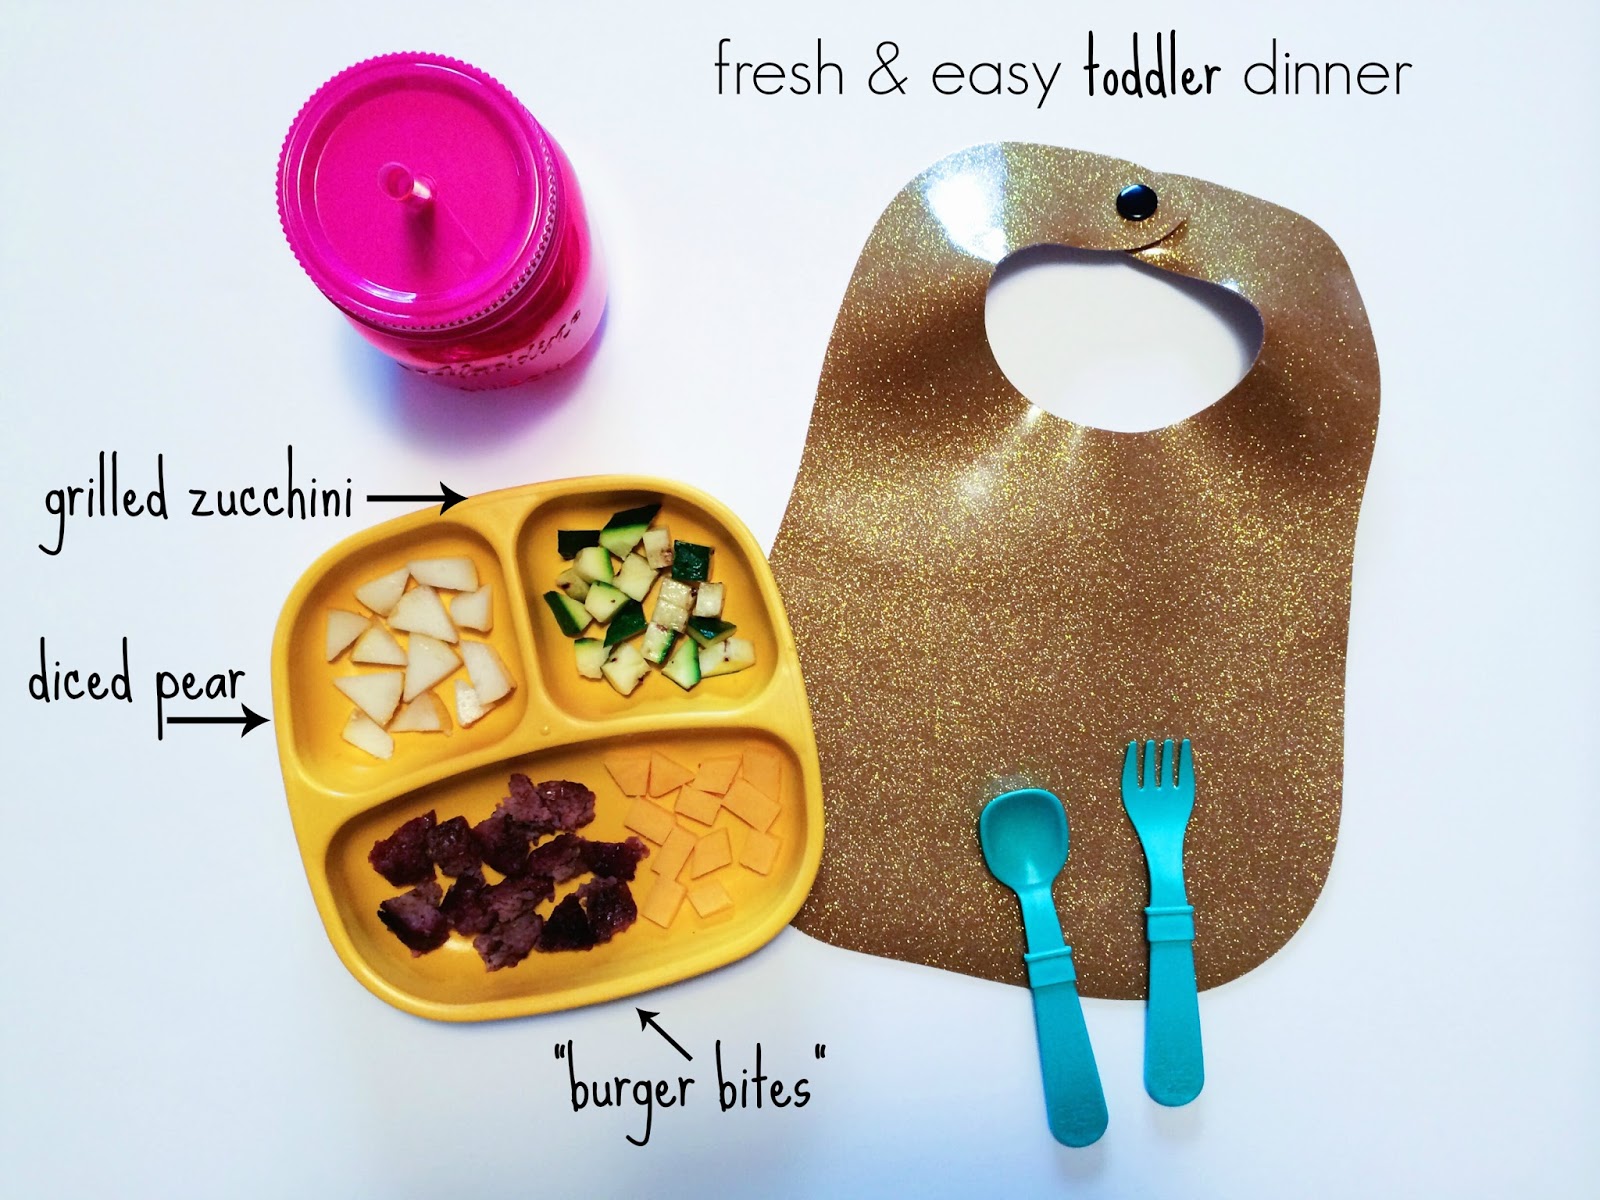
dinner || burger bites [grilled grass-fed beef + cheese], fresh diced pear & grilled zucchini

+ As a busy Mom, it's so important to have healthy foods on hand for your toddler that can be prepared in no time at all, but I also think it is important to feed your child what you're eating. Dustin and I agreed when we started Olivia on finger foods that we would not be making her 'separate' meals as she gets older -- she would eat what we were eating. All the meals you see are just modified versions of what we eat on a regular basis. I want Olivia to grow up knowing how to make healthy choices and how to keep an open mind when it comes to food instead of being a picky eater; this week's featured dinner is a great example of taking what you're eating and modifying it for your toddler without having to make an entirely separate meal +


the how to ||
      » Dice a ripe pear into bite-sized pieces 
      » Grill grass-fed beef burgers and zucchini [or any vegetable you have on hand] until cooked through and cut into age-appropriate sized pieces [We had burgers + zucchini for dinner and I simply cut part of a burger into small pieces and did the same with zucchini]
      » Serve the burger warm alongside diced cheddar cheese [or your child's favorite] or add cheese to the burger while still on the grill and allow it to melt

I'll be sharing lots more meal + snack ideas throughout September and also have a special collaboration planned with Re-Play, the maker of my absolute favorite plates and utensils! If you have any questions about this week's meals or topics you'd like me to address next week, just leave them in the comments below. Happy eating!


8.25.2014

shop spotlight || alexandra rose handmade

I am delighted to be sharing with you one of my all-time favorite handmade shops in this week's Shop Spotlight -- Alexandra Rose Handmade. With modern and eye-catching patterns used to make products that are both functional & top notch quality, Alexandra Rose Handmade is in a league all its own. Olivia has been privileged to rock many pieces from ARH over the past year & every single one has won us over from the moment it arrived on our doorstep. Plus, it's owned by Alexandra Rose herself -- the lovely & creative Mama of 2, who turned her passion for pattern and her need for a quality baby item for her own son into a growing & thriving business.


From her teethers to her drool bibs and of course, her gorgeous leggings, we love it all. 


I was so excited to collaborate this Fall with Alex because over the past several months she has become such a dear friend of mine. It has been a joy to watch her business grow to what it is today, and every ounce of her success is well-deserved. Alex puts so much time, care, energy, creativity, and thoughtfulness into her products -- from her fabric to her materials to her labels and business cards. 


The new Fall pieces she is releasing are seriously gorgeous. No picture does this drool bib + legging combo justice, and when Alex sent me a sneak peek before she dropped them in the mail, I literally gasped. They are that good. The quality was just as I knew it would be -- perfection. 

We have about half a dozen drool bibs from her shop and I put them on Olivia both for function [when she is teething] & for style. They are a great accessory to add style to an outfit but also protect clothes from being covered in drool. I keep one in my diaper bag and another in the car so we always have one on hand. I'm dying to stock up on a few from her new Fall line to give as gifts this coming winter. Her drool bibs are backed with the softest bamboo fleece & a pearl snap closure which is just extra elegant. The bamboo is not only luxurious against a babe's sensitive skin, but it is also absorbent and has anti-microbial properties while still being a sustainable resource!


Her leggings are just as wonderful -- made of organic cotton with serged seams for a professional & durable finish. When I look at them, I have a hard time believing they were made by hand -- they are that flawless. My favorite part about them [aside from the patterns] is that they have a no-roll elastic waistband. I've had so many leggings where after just a few times of putting them on V, the waistband is jumbled and uncomfortable. These offer the perfect fit, snug but comfortable, without any fuss. 


Aside from her drool bibs & leggings, Alexandra Rose Handmade is most known for her wooden teethers -- made of solid maple rings with fabric 'ears' attached for a baby to chew on to soothe sore gums. The first teether we ever gave Olivia was one of these & I love everything about it. The rings are the perfect size for a baby to hold [at 2.5''] & the fabric can be easily removed for washing so it always stays fresh. She also offers teething tethers, oversized burp cloths, organic knit shorts & even gift sets, perfect for any Mama to Be!


Below Alex shares more about her shop & her story //

"Hi, I'm Alex, wife, mamma and owner of Alexandra Rose Handmade. My goal in designing items for your children is to offer a unique twist on a practical product. The idea that a baby item can be stylish, functional and useful means so much to me. I can remember after having my oldest son I literally could not find a burp cloth that I wasn't embarrassed to use in public - and so I set out on the mission to create my own! My love of designing only grew, as did my family! After we welcomed our second precious boy my creative side needed another outlet, and I began making children's apparel and accessories...because, who needs free time, right?! ;)"

"I'm a huge fan of black, white & gray, but love a splash of color too. Geometric prints have my heart, and I absolutely love that they are so versatile. I always hope that my designs have an urban-meets-boho, comfortable, natural feel to them - and yes, that's a real thing :) I'm constantly inspired by my amazing boys, my love of shapes, the gorgeous pacific northwest and our time outside exploring."

"Our fall line has me crazy excited! Much more color than my traditional b&w palette, but so fun and versatile! Tons of bold shapes and geometric patterns in the perfect fall colorways. I love that all of the pieces can be mixed & matched in any combination - you can't go wrong!"

"Owning my own business has been the most stressful, crazy, hectic and yet rewarding thing I've ever done. I've been given the opportunity to help provide for my family, pursue a craft that I am passionate about and make connections with other absolutely amazing shop owners, all while staying home with my boys. I'm convinced there's no such thing as complete balance between being a wife, mom and entrepreneur, and there are some days where I wonder why I try and do it all, but I hope that my children learn that you really can make your dreams come true!"


what shop alexandra rose is known for || all natural wooden teething rings, luxury drool bibs backed in bamboo fleece, organic knit shorts + leggings & oversized burp cloths -- all in the most modern & stylish patterns

what sets shop alexandra rose apart || the quality of her products is the #1 characteristic that sets ARH apart; I have been so impressed with everything I own & would feel equally as proud to give any of her items as gifts; I also think the patterns she offers set her apart -- she has just the right amount of variety without having too many choices; her shop isn't cluttered or over-the-top -- it has everything you could want or need with enough variety to always keep you coming back for more 

my favorite products || I've already said so much. I think I can sum it up here & just say 'everything' // the new fall line is perfection [the coordinating set V is wearing is going to be our go-to from now until she outgrows them] & I will always love anything she offers in the classic gunmetal diamond.


quality + craftsmanship || top notch. from top to bottom, start to finish -- alex considers every last detail in each one of her products and only puts out the best of the best for her customers.

overall opinion || certainly you've gathered by now that Alexandra Rose Handmade is one of our favorite shops + that no matter what piece you purchase, you win.

value + recommendation || whether you're shopping for yourself + your babe, a new Mom or a Mama-to-Be, ARH has what you need and in the style you want. Whether you are looking for something classic or something vibrant & striking, you'll find it here. And the best part? Her prices are on point for the quality of her products and she is the sweetest ever to buy from!


giveaway || enter below to win a $30 shop credit to stock up on your own favorite Fall pieces as soon as they're released! giveaway runs from monday august 25 through sunday august 31. open to residents in US + Canada. winner will be announced & contacted by email and is responsible for responding within 24 hours to claim their prize. happy monday!

8.23.2014

on our bookshelf

I recently started a new mini series on instagram called Lit List [which was formerly just on my blog], where I share our favorite children's books with a photo and a short description of them. They can all be found under the tag #BlessedNestLitList // Olivia absolutely loves books and I have so much fun choosing them for her, and letting her pick some out herself now that she is a bit more independent and able to do so. I look for books that are not only beautifully illustrated cover to cover, but also filled with special stories that are unique, meaningful, and playful.


 I frequently get asked what books are our absolute favorites and what books I would recommend. Although it's so hard to narrow it down because we have so many favorites, I did a recap of our Favorite Reads for the First Year here. And today I wanted to share a quick list of what's currently on our bookshelf since I've come across so many more amazing reads since doing that post three months ago. Right now I am in the process of transitioning from our Summer collection into Fall books and I'm discovering new books all the time to add for the changing seasons!


Top Shelf / Left to Right


Middle Shelf / Left to Right


Bottom Shelf / Left to Right


Right now Olivia is reading Little Owl Lost 24-7. And I love it too because its short, sweet and a perfect one to sneak in right before bedtime after we've already read ten others! I ordered her another board book by the same author called Oh No, George and that will be here soon so I can't wait to peek into that and see if she likes it just as much. Sparky! always makes me laugh and especially with Dustin reads it out loud. There is just something so sweet about hearing your husband read your daughter a book about a little girl with a pet sloth. When he is reading it, I can't help but smile and laugh out loud. Lately Lily is a newer one that we absolutely love because of the bright and vivid colors and the sweet story. Sleep Like A Tiger and Dream Animals are our two favorites for bedtime books, along with A Book of Sleep and of course, Goodnight Moon. Sleep Like A Tiger has some of the most stunning illustrations I've ever seen. The second shelf is filled with lots of my favorites for Fall and I especially enjoy The Little Yellow Leaf

A few currently on our wish list include Stuck, Wave & Dear Zoo. Dear Zoo was a classic when I was a little girl so definitely one I'll get for Olivia soon. Stuck and Wave are both more of summer books but of course we'll enjoy them all year long! A few are in the mail that will be perfect for Fall and I can't wait to share those soon!

I'll also be sharing more about each of our favorite books on instagram over the coming weeks and months, especially my picks for Fall as we move into my favorite season // Every single one of these is a work of art in itself and you can't go wrong no matter which you choose! Happy weekend & happy reading!

8.20.2014

sea salt & maple caramel corn

If you follow me on instagram, you'll know I'm pretty obsessed with candles, and some of my favorites are from the Bath & Body Works Fall Collection, including SEA SALT & MAPLE POPCORN. After being inspired by the amazing scent of the candle, I ventured to create my own coordinating recipe. I used a basic caramel corn base and added in maple syrup for extra flavor and finished it with some coarse sea salt. I'm going to be honest when I say that I could have eaten the entire bowl of it, but fortunately I had guests over so I didn't couldn't. 

This popcorn can be made in less than 15 minutes and is sure to be a crowd-pleaser for any occasion. I recommend lighting your favorite pumpkin candle, curling up with a big quilt on the couch and enjoying each and every munch and crunch in complete & total silence. Or at least, as a Stay at Home Mama of a busy+noisy toddler, that is what my dreams are made of.

SEA SALT & MAPLE CARAMEL CORN


what you'll need //

1/2 cup packed brown sugar
1/2 cup light corn syrup
1/4 cup butter [half a stick]
1/2 teaspoon salt
8 cups popcorn popped OR an air popper & popping corn
1/4 cup real maple syrup + more to add as desired
1-2 TSP coarse sea salt for finishing

what you'll do //

» begin by popping your popcorn in an air popper and set aside if you haven't already done so
» in a large dutch oven, heat butter, brown sugar & corn syrup over medium heat, stirring constantly 
» add 1/2 tsp salt
» add 1/4 cup real maple syrup and stir to combine; give it a taste & add more as desired for a strong maple flavor [add in 1 TBSP at a time & continue to taste]
» pour your popcorn into the dutch oven and coat it well in the caramel-maple mixture
» finish with coarse sea salt as desired

» serve warm & enjoy; it will be sticky and chewy at first and then harder + crunchier after sitting 1-2 hours; I love it chewy while it's still warm but you can certainly prepare it earlier in the day and spread it out on a baking sheet to harden if you want a crunchier texture later that night!


enjoy.

8.19.2014

toddler meals | week 3

This week marks Week 3 of my new series on Toddler Meals! My focus is to create simple and healthy meals that are nutritionally balanced but easy to prepare for busy moms. All the meals can be modified to your child's preferences and are meant to be a starting point for getting creative and having fun in the kitchen. They are all meals that Olivia loves to eat and that I feel good about serving.

The past two weeks can be found below. Enjoy!
Week 1 || Week 2

breakfast || banana wedges, pear yogurt + toasted PB&J strips

+ One of the most quintessential meals from my childhood was a peanut butter & jelly sandwich, always on white bread with the crusts cut off. My grandma Bea had an antique metal mold that would form my PB&Js into the neatest shape and they seriously made my childhood [along with Sesame Street and Goodnight Moon of course]. Early into motherhood, just days and weeks after Olivia was born, I remember eating PB&J on toasted English Muffins at 2 in the morning between her feedings. They always bring me back to the most special times and this breakfast recreates the classic combo +


the how to ||
      » peel & slice a ripe banana into wedges that are age-appropriate for your child

      » PB&J strips can be made on any bread or toast you have on hand, but I find that when the bread is too soft and the peanut butter is extra gooey [as it should be], it can be difficult for little mouths to eat, so my favorite way to serve it is on a toasted english muffin; it is sturdy enough that it's easy for V to eat but still soft  and oh so delicious; simply toast half an english muffin until lightly browned; cut in half; spread your child's favorite jam or jelly on one half [real raspberry preserves is our go-to] & your child's favorite nut butter on the other half [old home crunchy is what we love]; cut into thin strips or tiny pieces if your child is younger

      » serve both alongside your child's favorite yogurt; we love Stonyfield Farms YoBaby and YoToddler brand and the Peach + Pear set is V's current craving!

lunch || deconstructed egg salad sandwich + avocado

+ Can you tell we love english muffins in our house? They are something we always have on hand, just like hard-boiled eggs. On any given day, we have 2-3 dozen eggs in our frig at once because we eat them so often; egg-salad is one of our all-time favorite foods and can be made in no time at all with just a few simple ingredients; this version is kid-friendly and since I first gave it to her last weekend, Via can't get enough! I serve it alongside a buttered english muffin and creamy avocado slices; this is one of those lunches that I eat right alongside V cause its just that good +


the how to ||
      » Cut a ripe avocado in half and remove the pit; scoop one side out and cut into slices or small cubes

     » Toast half an english muffin, butter it and cut in half again; if your child is younger and cannot bite 'off' something, just cut it into bite sized pieces using a serrated knife     

    » Hard-boil eggs [I do this ahead of time on Sunday nights in a big batch for the week ahead] & let cool; finely mince celery and red onion [we grill our red onion to create a more caramelized, mild flavor and it adds so much to the salad]; using an egg slicer, cut egg into small pieces for salad; mix with celery and red onion in a bowl; add small dollop of kid-friendly mayo [our favorite here] and mix until combined; season with S+P to taste if desired and serve!

snack || grapes + cheese

+ Everybody knows that grapes and cheese just pair so well together; when I'm hungry but just need a little something instead of a full meal, I often grab a handful of fresh grapes [red or green, whatever we have in the frig] and a slice of sharp cheddar cheese, so one day I thought: Why not offer the same snack to Via? The creamy richness of the cheese is perfect alongside the sweet and juicy grapes; cut into wedges or appropriate-sized pieces for your little one and serve them up in a fun way that allows your toddler to graze while playing after naptime +


the how to ||
     » cut your child's favorite kind of cheese into bite-sized pieces [we love horizon organic colby or cracker barrel sharp cheddar]

     » rinse fresh grapes well [buy organic whenever possible because grapes are one of the top crops for pesticides!] and cut into age-approrpriate bite-sized pieces 
     
dinner || simple chicken lettuce wraps, brown rice & sweet potato cubes

+ Dustin and I eat a lot of lettuce wraps -- as in, every single week and usually more than once a week! Lettuce wraps are a great way to eat a healthy and veggie-packed dinner that is also gluten free! Crunchy and crisp butter lettuce is the perfect vehicle and I modified our favorite lettuce wrap recipe to be kid-friendly and the best part is that it only requires a few simple ingredients: olive oil, chicken, S+P and lettuce! Serve it alongside brown rice and your child's favorite baked or steamed vegetable +


the how to ||
     » Peel sweet potatoes and cube; steam in a medium sized stock pot for 6-8 minutes or until tender

     » Cook brown rice according to package; our absolute favorite here
               It comes frozen but the rice is fully cooked with 3 bags per box; I prepare 1/3 bag in coconut oil in a stock pot over medium-low heat and add liquid aminos for flavoring without all the icky chemicals found in regular soy sauce as a side for Olivia, or one full bag for the three of us / it's ready in about 5 minutes with no fuss and so much flavor]

     »  Prepare Lettuce Wraps: I make all of our chicken together and then remove Olivia's before adding our lettuce wrap sauce since it's a bit too spicy; in a large stock pot or dutch oven, heat extra virgin olive oil on medium heat; add chicken breasts [cut into 1-2 inch pieces]; sauté both sides until chicken is cooked through; add S+P or chopped cilantro; serve in a lettuce cup if desired or chop the lettuce and the chicken into age-appropriate pieces to be finger foods; nix the lettuce altogether if your child isn't interested [it's the thought that counts, right?]

I hope these meals make their way into your home and satisfy your hungry toddler! 
I'll be sharing more meal ideas next week!

8.15.2014

sweet & spicy grilled asparagus salad

In the summer, we grill out a lot, as in almost every night. We typically grill some form of lean protein or fish and then whatever vegetable is in season. This summer we've been loving grilled asparagus, more than ever before! 


We've always enjoyed it, but we've taken our love of it to a whole new level over the past few months. Today's recipe showcases grilled asparagus in a salad that can be served warm, cold, or even at room temperature. It's a no fuss, 4-ingredient salad that is not only visually appealing but unbelievably delicious. 

sweet & spicy grilled asparagus salad with parmesan & pecans


what you'll need

fresh asparagus || trimmed [approximately 5-7 spears per person depending on spear size]

sweet & spicy pecans || you can make your own or buy any brand that catches your eye [to make your own, use this recipe + add 1/2 tsp cayenne pepper and 1/4 tsp black pepper to your salt + sugar mixture]

shaved parmesan cheese || again, any brand will do but TJ's Shaved Parmesan, Romano & Asiago blend is perfection

extra virgin olive oil // S+P

grill pan or outdoor grill

what you'll do
» heat your grill and toss raw asparagus in olive oil to coat; add S+P
» grill asparagus until tender, about 7-8 minutes
» cut grilled asparagus into 1-2 inch pieces; set aside
» coarsely chop pecans
» toss asparagus, while warm, with shaved parmesan and pecans
» add s+p to taste

our favorite way to serve this salad is alongside salmon & brown rice while it's warm, but it is equally delicious cold the next day for lunch or at room temperature for a picnic. the cheese offers a nutty and rich sensation when paired with the tender asparagus, and the pecans offer a crunchy kick of flavor with just the right mix of heat and sweet. it is our go-to side dish for entertaining & so easy to throw together!

8.13.2014

brown butter sea salt rice krispie bars

I have a confession: I've never been a huge rice krispie bar person. I was always the girl who never considered them a "real dessert" mainly because they weren't too terribly exciting.
I didn't crave rice krispie bars after dinner; I wouldn't spoil my appetite on rice krispie bars.
They were never at the top of my "Favorite Desserts of All Time" list [you don't have one of those?]
Until now.


These oooey gooey bars full of browned butter and sea salt have officially won me over. I would easily say they are one of the best desserts I've ever had. So light and airy, with a slight nuttiness and depth of flavor from the brown butter, a sweetness from the chewy melted marshmallows, paired with the crispy rice cereal & coarse sea salt on top...seriously, my taste buds were having a dance off with every bite. In fact, I am already figuring out what occasion I can come up with for an excuse make them again. Then again, I don't think I've ever needed an excuse to make dessert.

These bars are so easy to make and require only minutes of work with a huge payoff. My favorite way to eat them is when they're still warm and not quite set, and I love when they are rustic and asymmetrical. If I wanted a perfectly cut rectangular rice krispie bar, I would buy one from the store. And after making these, I will never, ever buy one.


what you'll need

6 cups of rice krispie cereal [approximately half a 12 oz. box]
8 TBSP [1 stick] of butter
10 oz. bag of mini marshmallows
1/2 tsp sea salt

extra sea salt coarsely ground for finishing

8x8 glass baking dish + butter to coat
large pot
wooden spoon or spatula

what you'll do

» Generously coat your baking dish evenly with softened butter; set aside

» In a large pot, heat 1 stick of butter on medium low heat || The entire process to brown butter takes anywhere from 5-10 minutes depending on your heat level, pot, stovetop, etc. but it is critical that you do not step away from your pan as you are browning the butter

» First, the butter will melt
» Then, the butter will foam
» Next, it will turn a clear golden color [You will notice the color as you are stirring it]
» Finally, it will begin to smell nutty and start to turn darker brown

» As you are browning the butter, gently stir frequently and be sure to scrape any bits off the bottom of the pan; do not take your eyes off the pot || While it takes a few minutes for it to begin foaming and then turning color, be patient! Once it does, it goes very quick and the time between when the butter takes on color and burns is often a matter of seconds.

» As soon as your butter has taken on a nutty brown color, turn the heat off completely
» Add in the bag of mini marshmallows and stir; the residual heat from the butter should be enough to melt the marshmallows but if not, turn stove back on low and stir until smooth

» Remove the pot from the stove and stir in rice krispies and 1/2 tsp ground sea salt
» Quickly spread into prepared 8x8 pan, using a spatula to flatten or shape as desired

» Finish it off by sprinkling coarse sea salt evenly over the top to your preference

Sneak a taste while they're still gooey and warm, and then let cool and set up for 20-30 minutes before cutting into squares. Oh and be sure you ran like 10 miles that day because you're going to want to eat the whole pan. Enjoy!

8.12.2021

Toddler Meals | Week 2

I started a new series this month all about Toddler Meals. As many of you already know, I absolutely love to cook [and eat!] and I hope to instill that same passion in Olivia -- to make healthy, balanced choices that are both nutritionally dense and full of flavor! This series is centered around offering moms like me Mindful Meals for Playful Kids. In each post I offer three meals -- essentially breakfast, lunch & dinner and one easy snack. I focus on keeping it simple but also providing the nutrition a growing toddler needs!

|| Week 1 Available Here ||

breakfast || hard boiled egg, [gf] banana muffin & diced avocado

+ Hard boiled eggs are such a great addition to your toddler's breakfast and even make a great midday snack. On Sundays I usually boil a dozen eggs and keep them in the fridge for the week ahead. Both Dustin and I eat them for snacks with S+P and Olivia loves them as well. It's great to be able to offer [egg] protein in a way other than scrambled! Banana muffins are a treat for Olivia and we don't make them very often, but every once in awhile her breakfast includes one. You could swap out your child's favorite baked treat or simply offer toast with banana slices and honey on top! +


the how to ||
      » hard boil eggs [in a medium stockpot, bring cold water to a boil, add eggs, turn heat to medium, simmer for 10 minutes], remove pot from heat, drain water and give the eggs a few good shakes in the pan to crack them through; immediately pour into ice water bath and let cool; the water will seep under shell cracks and make peeling super easy; store in airtight container in fridge for up to 3 days
      » slice a ripe avocado in half and remove pit; scoop out each side with a spoon and dice into age-appropriate pieces
      » make your favorite muffins using a muffin mix according to instructions || our go-to mix here

lunch || strawberries, sweet potato "spaghetti," grilled chicken & black beans

+ Making meals for toddlers should not only be about offering nutritious foods but also making it fun. One way I do this is by making sweet potato "spaghetti" that Olivia loves to feed herself and twirl on a fork. If your child is not able to eat something like this, just prepare sweet potatoes by peeling, cubing and steaming. Beans are a great addition to any meal because they amp up the protein and are so easy for little fingers to pick up +


the how to ||
      » Rinse and dice fresh strawberries [or any fruit that is in season!]
     »  Peel whole sweet potato by hand; using a spiralizer, spiralize the sweet potato to make sweet potato "spaghetti" // Steam about 3 minutes until tender but not mushy
     »  Grill chicken using a grill pan or outdoor grill and cut into age appropriate pieces
     »  Open a can of black beans, rinse well and serve! Easy, right?

snack || nut butter banana moons 

+ I used peanut butter in these because Olivia loves it, but you can sub any type of nut butter than your child likes. Almond butter and cashew butter would both be delicious with bananas! This is a great snack that can be thrown together in a matter of minutes and only requires two things: a banana and nut butter. Be sure your child is at an appropriate age to consume nut butters; we avoided peanuts & peanut butter until Olivia reached one year +


the how to ||
     » Slice a ripe banana into 1/2 inch slices
     » Spread a small dollop of nut butter onto half of the slices and top with the other half
     » Cut each set of slices into half moons or into quarters depending on your child's age
     
dinner || steamed peas, fresh raspberries & baked wild sockeye salmon

+ Olivia eats a lot of salmon, not only because we eat a lot of salmon but also because she loves it. You can swap out any fresh wild-caught fish that your baby likes, or even do baked chicken or turkey in place of salmon. Sockeye, though, is full of flavor and super tender. It flakes easily into bite sized pieces that Olivia can pick up and feed herself. Peas are another meal staple I always keep on hand because they can be purchased frozen and steamed within minutes for a quick healthy side +


the how to ||
     » Steam petite green peas in stockpot for 3-4 minutes or until tender; remove from pot, let cool slightly and store in an airtight container for up to 4 days
     » Rinse any fresh berries you have on hand and cut if necessary
     »  Bake wild caught salmon [on a baking sheet lined with foil] at 350 degrees for 15-18 minutes depending on oven and fillet thickness; be sure to remove any bones before baking; let cool slightly and flake into age-appropriate sized pieces; I top it with a little butter or coconut oil before serving

I'd love to know what questions you have about feeding your toddler and what more you would like to see as part of this series! Next week I'll have three more meals and a snack as well as a recap of my favorite feeding products! 

Back to Top