6.19.2014

transitioning baby's eating

I’ve gotten a lot of questions lately regarding introducing chunky & textured solids, offering finger foods and when to transition away from purees entirely.  Below is an update on Olivia’s eating habits as well as some common questions answered in regard to each of these topics, plus a layout of the common stages of food progression for reference.


Update on Olivia’s Eating Habits
Olivia got her first teeth around 10.5 months and they all came at once. She went from 0 to 4 teeth in a matter of two weeks. Until then, I hesitated to introduce finger foods and I had difficulty with encouraging her to feed herself because she still couldn’t chew anything unless it was extremely soft. Once her teeth came in, around 11 months, we really amped up the amount of chunky solids she received and began the process of transitioning away from purees and toward all solids and finger foods.

I couldn’t expect Olivia to eat bites of chicken and other meats that required chewing if she didn’t have any teeth to break the food down with, so I waited until I felt confident in her abilities because adequate protein is so critical in a baby's diet. And although this meant baby purees longer than I initially anticipated, it also saved us a lot of frustration because when I did introduce  diced food and finger foods, since Olivia was actually able to mash thicker textures and begin feeding herself, chewing & eating everything I offered. Around 9-10 months, I started offering purees with chunkier textures and around 11 months I began offering finger foods and Olivia began to feed herself independently.

>> Olivia’s Timeline <<

6 months: Introduced Solids [Stage 1]

8 months: Began introducing mashed foods [Stage 2[

9 months: Introduced Sippy Cup + Water

10 months: Amped up chunky solids which required Olivia to mash food using her gums [before she had any teeth] and added in some finely diced food [Stage 3]

11 months: Olivia went from 0-4 teeth [2 top + 2 bottom] & I began transitioning away from purees while simultaneously introducing finger foods, 60% chunky purees +  40% finger foods // I also introduced a straw using our favorite Lollacup [Stage 3-4]

12 months: Olivia got two more teeth [on top] and perfected her pincer grasp, so we moved to about 70% finger foods + 30% chunky purees [Stage 4]

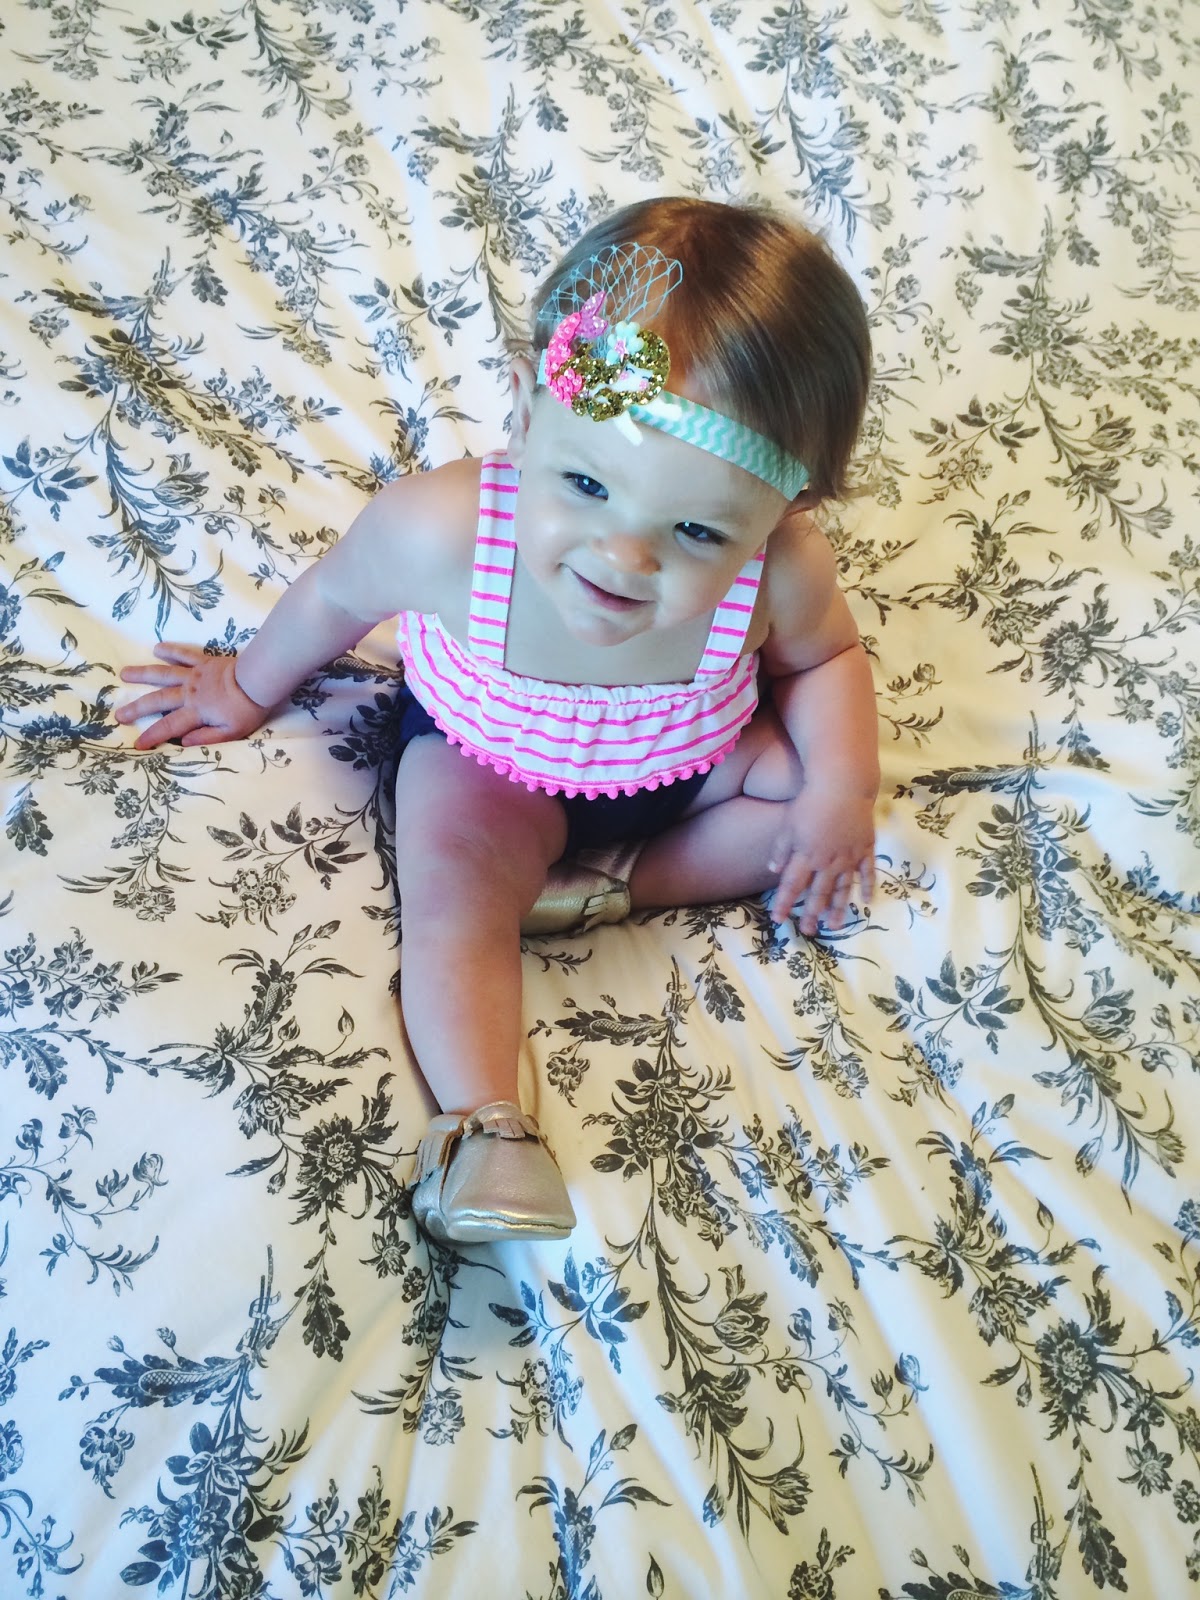
Where We’re At Now: At nearly 13 months old, Olivia loves to feed herself finger foods and hold a spoon. I still offer some chunky purees [with cod, salmon, chicken and turkey] because self-feeding and chewing meat has been tricky for her and I want to be sure she is getting adequate protein. Meats are the most difficult part for her to chew because she hasn’t gotten her first molars in yet. 80% finger foods/self feeding + 20% chunky purees [Stage 5]

Chunky Solids & Finger Foods

On average, most parents introduce chunky solids when their babies reach 8-9 months, but it all depends on how many teeth a baby has and how they are tolerating their smooth purees. 
[Note: If you are doing Baby Led Weaning, the process is entirely different].

Finger foods may be introduced in conjunction with chunkier solids, around 8-9 months, but some parents choose to wait until 10-12 months. The only real answer? There is no “right” time or age to introduce either, because every baby is different. If only there was a clear cut solution, right?

The natural progression of solids is:
Stage 1: Pureed Food // Often single ingredients, given around 6 months of age
[Pureed sweet potato, pureed avocado, any pureed fruit or vegetable]

Stage 2: Mashed Food // 1-3 ingredients after you have established no allergies, often 6.5-7 months of age
[An example of this would be avocado + egg yolk + banana mashed together for a baby’s breakfast]

Stage 3: Finely Diced Food // Often 8-10 months of age depending on the baby
[Any soft food diced into tiny pieces that are no larger than a kernel of corn]

Stage 4: Finger Food // 9-12 months of age depending on your baby
[Any soft food cut into pieces about the size of a dime]

Stage 5: Increased Self Feeding // Reached after a baby has successfully accomplished finger foods, considered when about 80% of a baby’s diet comes from what they feed themselves rather than what is fed to them
At this stage, you still have to cut food into pieces smaller than what you would eat yourself in order to prevent choking, but your child can handle fairly large chunks of solid food; you still may need to cut meat quite small as it is harder to chew, but there is less need to mince it; chances are your baby’s appetite is increasing and you will be feeding him or her larger meals

Stage 6: Table Food // This is what you are ultimately working toward: when your baby can eat exactly what the rest of the family eats and there is no longer a need to prepare special meals for your child.
At this stage, you will be teaching your child to feed him- or herself with utensils & for most babies, this stage begins between 12 and 15 months.

Chunky & Textured Solids
 [Chunky or textured solids = purees that are not completely smooth and that have larger pieces of soft food in them that require a baby to mash before swallowing or foods that are mashed into chunks but are not a smooth consistency]

When to Introduce Chunky + Textured Solids
1.     When your baby has been eating smooth purees for 2-3 months and tolerating it well
2.     When your baby is showing interest in eating something beyond purees whether by watching adults eat, reaching for table food, etc.

The How To:
Once you child shows the beginning of up and down chewing movement, mashed foods can be introduced, either directly into purees or separately. Increase the amount of chunky foods gradually; you can either use a fork to mash the food or a quick run in a food processor but leaving texture

Keep in Mind…
Babies don’t necessarily have to have a lot of teeth to tolerate more texture in their foods since they can often gum soft foods very well

When transitioning from smooth purees to chunky purees, the chunks of food should still be very soft

The first teeth a baby gets are not made for chewing, they are just for biting [which makes sense that they are at the front of the mouth and not the back]

There is often a window of opportunity [around 9-12 months] in which it will be much easier for your baby to learn to accept different textures

Finger Foods
 [Finger Foods = Bite-size foods that require a baby pick up and feed him- or herself and fully chew before swallowing]

When to Introduce Finger Foods

1.     When your baby shows they want to feed themselves by doing such things as grabbing a spoon or reaching for food off an adult plate
2.     When your baby has established an adequate Pincer Grasp
3.     Once your baby can handle chewing finely diced food [see above] and has had some practice with easy to grasp foods like rice puffs or cheerios

The How To:
Simply scatter a few pieces of finger food onto your baby’s highchair tray or plate. Let them figure it out by picking up food and bringing it to their mouth. If they aren’t sure what to do, try showing them. For awhile, I mimicked the motion while Olivia sat and watched. 

Keep in mind…
Baby Finger Foods should be “mash-able” between the gums

At first, babies “rake” food into their hand (and its pretty much the cutest thing ever!) but soon after they develop the Pincer Grasp, which allows them to pick up small objects between their thumb and forefinger. At that point, your baby can become a pro at self-feeding!

When starting out, finger foods will merely supplement your baby’s diet as he/she figures out the mechanics of self-feeding; some babies start out by just holding food in their fist and don’t actually move it to their mouth. Others place their hand flat against their mouth or put their food down and pick it up again with more food exposed.

Always supervise your baby when offering finger foods and still be sure to cut pieces small enough that they do not present a choking hazard

Self-feeding is often messy but because it is a learned skill, as a parent you must give your baby room to explore and enjoy it // To make it easier, use a proper high chair in a relaxed environment with no distractions

Try introducing finger foods once a day at first [1 meal] and then move to every meal. As adults, we forget the amount of energy, thinking and work that goes into self-feeding finger foods and if your baby is tired, sick, or teething, they may hesitate or fuss. I notice on certain days or certain times of the day, Olivia fusses and would rather eat a puree. It is often when she is extra tired and feeding herself seems like too much work.

Be flexible and let your baby learn at his or her own pace. If the first few times it isn’t successful, keep trying. I remember offering finger foods to Olivia around 8 months and she had no interest. I tried again at 9 months and again, no interest. I waited a few weeks and tried a third time and it was so natural for her and she loved it. It is all about trial and error!

As with any milestone in your baby’s life, it is less about when they accomplish it and more about successfully accomplishing the previous stage before moving onto the next. If a baby isn’t tolerating chunky foods well, even at 11 months, don’t move onto finger foods solely because of their age. Give them time to accomplish the stage they are in before moving onto the next one. It will set them up for maximum success and save you a lot of stress! Every baby is different and every stage is fun!

Stay tuned for posts coming soon all about When to Introduce a Sippy Cup, Our Favorite Finger Foods and an upcoming series on Toddler Meals kicking off in August as part of the Fall Showcase!

6.17.2014

zucchini spiral summer salad [gf]

Summer holidays almost always involve grilling out. Not only is it always delicious, but it makes for an easy dinner with little to no clean up. Plus we eat outside, pull the food hot off the grill straight to the plate and then have a perfect excuse for a bonfire and s'mores because really, you can't grill and then not have a fire.

For Father's Day this year, we had my parents and Grandma Bea over and grilled up our favorite [all beef] hot dogs that are seriously amazing [and I am not a hot dog person]. We normally throw all our veggies on the grill as a side, but I wanted to minimize the work for Dustin, since he was part of who we were celebrating after all! I thought a great way to incorporate veggies without having to grill them would be through a pasta salad. And of course, with a spiralizer.

Inspired by a recipe I found on Inspiralized a few weeks ago, I put my own twist on this salad and every one of us fell in love. Even Miss Via enjoyed every bite!

Zucchini Spiral Summer Salad
This recipe is so quick & easy to throw together, perfect for a bbq out back and can be customized to your tastes because its so flexible! Full of fresh, bold flavors and a light flavorful dressing, it is sure to become a new favorite for weekend cookouts!

What You Need //

S A L A D
2-3 large zucchinis // I love lots of zoodles, so I tend to do 3 large zucchini. In this recipe, more is more!
1-2 thick slices salami // We use Boar's Head Peppered Salami, cut from the deli about half an inch thick
1-2 thick slices provolone // Be sure to get a high quality provolone and ask for it to be sliced the same thickness as the salami
1 [8 oz] jar of grilled artichoke hearts in oil [or 1 cup canned] // My favorite brand is Reese Grilled Marinated Artichoke Hearts 
1 small red onion, sliced thinly
1 cup black olives, quartered

D R E S S I N G
3-4 TBSP Extra Virgin Olive Oil
1-2 TBSP Fresh Squeezed Lemon Juice
1/2 tsp dried oregano
1/2 tsp dried parsley
1/2 tsp dried basil
S+P to taste

What You Do //
1. Prepare the zucchini noodles [zoodles]. Your goal is to make half moons on purpose, to mimic elbow shaped pasta that you would normally find in a pasta salad. To do this, start by cutting your zucchini half way through [lengthwise] but be careful not to cut it all the way through. Using your spiralizer with the medium blade [larger triangles for a thick noodle], spiralize your zucchini. Because of the cut you made, you will end up with half moons or half spirals. That is what you want!

2. Prepare your dressing. Mix all dressing ingredients to desired taste. Start with a small amount of lemon juice and add more as needed. Taste as you go & finish with extra S+P. The goal is a very light and refreshing, tangy flavorful dressing that will be perfect to coat the veggies without being overpowering.

3. Prepare your salami & cheese. Using a sharp knife, dice salami and cheese into small cubes of equal sizes.

4. Mix all ingredients in a large bowl -- zoodles, artichokes [drained], diced salami and provolone, sliced red onion, sliced black olives & toss with dressing, adjusting seasoning to taste. 

5. Serve at room temperature or cold // Salad will keep in the fridge up to a day but I'm pretty sure it won't last that long because its just that good! Enjoy!

6.15.2014

a father's love

There is nothing quite like watching your husband fall in love with your daughter and knowing he will love her forever in a way that no one else can. Every moment I watch Dustin through his journey of fatherhood with Olivia, I fall more in love with them both. 

A father's love for his daughter is a thing of such beauty & perfection. 
It embodies selflessness, protection, sacrifice, influence, gentleness & love. It is a bond like nothing else in this world and the love between a father and daughter is forever.

My heart is so full to be able to celebrate this day with the man who swept me off my feet 
and who I know has swept Olivia off hers.


Dustin is the most generous, kind, loving man. 
He always sees the best in others and never turns down an opportunity to serve, to listen, to love.
He makes both of us girls laugh like nobody else can, and Olivia's face lights up when he walks in the room just the way mine does. As soon as the garage door opens in the afternoon, Olivia looks at me and says "DaDa," knowing he is home from work to be with us. 

Dustin has shown that fatherhood is truly God's calling on his life, because he stepped into the role with ease and has been loving Olivia perfectly and flawlessly ever since.


And the other man I celebrate today? My own father. The man who has always supported me, challenged me, encouraged me, taught me, prayed for me, listened to me, and loved me. 


Olivia and I are blessed with the best of the best. 

And my Grandpa Milan, my Mama's Dad, who was much like a father to me for more than half of my life, is loving the view from above, celebrating with all of us in spirit. His signature tattooed on my right wrist reminds me every day of the love he had for me and all the memories we shared. His name in Czech means "Beloved" which is the significance behind my tattoo. 
On Father's Day I also think of how I am my Father's Beloved -- a Daughter of the King. The most majestic & perfect Father of them all.

6.14.2014

romper season

Olivia has been rockin' rompers left and right. I love them because they are so versatile, pair with anything & provide the perfect outfit for a summer day. Below are our favorite picks for this season's most stylish rompers for your little lady!


1 / 2 / 3 / 4 / 5 / 6 / 7 / 8

I pretty much squealed when I saw the lemon romper released last week. Seriously, so cute. What says summer better than lemons? I can't wait to get Olivia in it with a cute yellow headband and her aruba moccasins. #2 and #4 are ones I snagged a few sales back and love them both. #2 has the cutest cross back straps ever, plus denim is always versatile and classy. #5 is a navy romper with tiny white stars and Olivia will be sporting that over the 4th of July holiday weekend. #6 is actually a Target find -- they have had some of the best rompers so far this season. And for those of you who have a tiny baby (or who are expecting a baby girl this summer), #8 is my pick. It only goes up to size 9 months but is a white one piece with gray giraffes and so darling. Happy Romper Season!

6.11.2021

Motherhood: Choice, Grace & The Beauty of It All

Today's post is based on a guest post I had written for The Cradle Coach Blog about a month ago and I thought it would be fitting to share here if you weren't able to read it a few weeks back. At the time I was asked to write it, Olivia was just days away from turning one and it was a perfect way for me to reflect on my first year of Motherhood.

---

I believe Motherhood is all about choice and grace. As a mother, you are given the opportunity to make choices every day, big and small, that will affect this new life you’ve been blessed with. You are also given the opportunity to choose the perspective - the attitude - with which you will approach those choices. Whether it is your first baby or your tenth, whether you have read countless books and done endless research, or you’re entering this wild and new part of life completely blindly, the only thing that can be certain is your need to make choices day by day. You may find yourself questioning the choices you are making and wonder how you will survive the first days, weeks and months of motherhood, all the while feeling like you have no idea what you’re doing. The good news? None of us do, really. We are all clueless, uncertain, and questioning our every move. Or at least, I was.
(But chances are, most moms you meet, will say the same).

I come from a rather researched background, if you had to put me in one of the two categories. I grew up as an only child but have always been independent, with a desire to be a mom since I was a little girl. After meeting and marrying my now-husband, that dream came true when we welcomed our first daughter, Olivia Beatrice, into the world on May 23, 2013.

I completed college classes as a junior and senior in highschool (through PSEO) and went on to a local private Christian university to obtain my Bachelor’s Degree in the Science of Nursing, graduating in May of 2012 at age 22. I had completed my senior internship in women’s care, labor & delivery and newborn care and my externship was completed in pediatric school nursing. You would think the sum of all of these experiences together would lead to a very confident attitude in motherhood, but like many others, I was both terrified and clueless after Olivia was born. I had no idea how I would make it from one hour to the next, or how I would make it from one day to the next, especially after leaving the hospital and taking our tiny sweetheart home.

Throughout those first weeks, I struggled with breastfeeding and sleeplessness, as well as Olivia’s newborn jaundice (from said breastfeeding). Side note: Whoever said breastfeeding is easy and “natural” because you’re a woman clearly has never had children, because it is not an automatic skill you are born with, and there is a huge learning curve! And even as an RN, I didn’t pick up on the early signs of jaundice - I was that sleep deprived. After a brief stint in the NICU to resolve Olivia’s jaundice, we were back home and things were finally beginning to improve, but I still had to make the choice to take life day by day, and to have a good attitude while living it.

As you approach motherhood and especially in the weeks after birth, you also must be aware of the importance of grace - grace toward your baby, toward others, and especially - toward yourself. Early on, I felt silly for not recognizing the early signs of jaundice in Olivia; I felt like a failure for not being perfect at breastfeeding right away; and I felt hopeless as I was up all night, every night while Olivia cluster fed and I found myself quickly withering away from lack of sleep and time to eat. I remember telling my husband that I felt so alone because I was the only one who could fully care for Olivia, the only one who could breastfeed her, and the only one who could be up all night with her since he had a demanding work schedule with early mornings. But placing pressure and blame on myself and wallowing in negative feelings didn’t get me anywhere; it left me feeling more stressed out and more hopeless. I ached for those nights to end but felt they never would.

Why am I telling you all this? Well, no matter where you are in your journey of motherhood - whether you are expecting and terrified, whether you just welcomed a brand new baby into this world, or whether you are further into it like I am, you are not alone and you are doing an amazing job! And once you learn to give yourself a little grace and to let go a little, life will get even better!

Motherhood has taught me so many things about life, about love, about the power of laughter and physical touch and especially, about grace. Every choice you make requires grace. You may make some excellent choices. You may make some mediocre ones, some rotten ones even. No matter what, give yourself grace through it all. Unlike any other experience in life, motherhood requires the ability to do something you have never done before yet you are simultaneously thrown into it immediately after your baby is born. Even without any previous training, you are expected to succeed at something you have never done and have had no time to prepare for. At the same time, you will spend your entire life trying to learn what motherhood is about, what it requires, what it means, where your strengths are, and where you need to give yourself grace. See what I mean? Unlike any other experience in life. Have you ever looked at it that way?

Motherhood is the most challenging, rewarding, exhausting, painful, joyful experience in the entire world. I am equally challenged and rewarded at the same time; the growth it has produced in me over the past 12 months is unlike anything else in my life. My character has been shaped and changed before my eyes without my even realizing it. I barely even remember who I was before Olivia. It’s still hard to believe I now have a little girl who walks and talks and calls me Mama.

Looking back, those first 6 weeks were some of the toughest of my entire life. I cried -- a lot of tears and often. I honestly didn’t know how I would make it to the next day, especially after terribly long nights. But when I finally stepped back out of the tiny little (stressful) world I had been living in, and tried to let go of it all (instead of overthinking it all) and instead embrace whatever happened, life got so much better. It wasn’t that Olivia’s breastfeeding habits all of a sudden changed, or that I started getting 10 hours of sleep a night, or that I suddenly knew what I was doing…it all had to do with my attitude: an attitude of grace and choice.

I finally realized that I could choose to give myself grace with the choices I was making. I could choose to give grace to Olivia when I was frustrated. I could choose a positive attitude, and choose to cherish the long, long nights holding and feeding her, because I knew one day they would be gone.

And they are gone, now. All of the chaos and stress of those first few months is gone and only a distant memory. I now have a 1-year-old who is equally independent and adventurous, curious and content and hilarious all at the same time. My advice to other new Mamas out there -- Practice cherishing those long, sleepless nights and those endless hours of rocking or cuddling. It is amazing what physical touch - a simple snuggle from your new baby - can do for the soul. Some nights, Olivia will still fall asleep on me with her arms wrapped around mine, and her simple touch rejuvenates my entire being.

Overall, I try to live my life with the attitude of finding contentment in every day no matter the stage of life that Olivia is in, or no matter the state of my own life. There will be positives and negatives to every stage, depending on how you look at it. The first weeks and months of motherhood will be challenging, but rewarding, and most definitely a whirlwind of “I don’t have a clue what I am doing,” but you can rest knowing time will pass, as it always does, and soon those first weeks and months will be long gone.

Your attitude is the key to finding peace and rest as you journey into the unknown of motherhood. I witnessed first-hand the power I held when I shifted my attitude, when I learned to give myself grace, and when I learned to choose positivity over negativity. When I finally learned to embrace this new adventure and welcome this wild journey, I discovered that through it all, there was more beauty than I had ever seen before. 
And really, what is more beautiful than being called Mama?

6.08.2021

our weekend in photos

We had such a fun weekend as a little family of 3! We spent a lot of time outside and enjoyed beautiful weather, some good movies & of course lots of yummy food!


Dustin came home from work on Friday with this beautiful wildflower bouquet.
They reminded him of me, he said.


On Friday night, we enjoyed sweet corn on the grill & enjoyed corn salsa leftovers all weekend long.


Date night isn't complete without s'mores around the bonfire. My Mama took Olivia for the evening so we had a wonderful dinner outside & time to cuddle by the fire just the two of us accompanied by our favorite treat. 


I pulled out my spiralizer to use it with some sweet potatoes & enjoyed "Sunrise Sweet Potato Spaghetti" for Saturday morning breakfast. Mind blown.


And let's be honest, no weekend is really complete without a trip to Target and I found some of the most fun and summery rompers for V. Target does it again.


On Saturday night, we watched a fantastic movie and right before we started it, Dustin surprised me with one of my favorite treats -- Sunflower Toffee -- locally made & unbelievably tasty.


On Sunday, we dressed Olivia up and took her to a small local Zoo where she loved looking at the coral in the aquariums. It was fitting that she wore her Mermaid Headband.


We ended our Sunday night with Chipotle salads out on the patio in the sunshine. 
A perfect finish to a great weekend together.

6.03.2022

byop night

One thing you should know about me is that I am a lot like my Mama. One thing you should know about her? She knows good food when she finds it and she loves to get creative in the kitchen and that is probably where my passionate love affair with food all started years ago. Mom and I often spend our time together checking out new cafes, bakeries and hidden gem restaurants, or grocery shopping and planning family meals. She randomly brings me food gifts, like fresh cut rhubarb for crisp [recipe here] & homemade caramel corn for no reason and she always has my favorite foods stocked in her fridge just incase I stop by. I am one blessed daughter, and I imagine you are all going to love my Mama as much as I do after I share with you today's recipe -- No Fuss Homemade Gluten Free pizza. Why? Well, because my Mama came up with it.
Sunday night family dinners often bring thoughts of pot roast, potatoes, fresh cornbread & strawberry shortcake. [Come to think of it, that sounds like a perfect menu]. But sometimes, especially in the summer, the thought of a big Sunday night dinner that requires hours in the kitchen just isn't my cup of tea, so this summer, as life gets busier & the weather gets hotter, I am working on coming up with new ways to enjoy Sunday night dinners that leave room for creativity and lots of fun. It was fitting to kick off this new venture of mine on Sunday the 1st of June, as that marks a new month and as many of you know, I love starting things on the 1st day of the week / month / year. 

It all began last week when my Mom texted me a photo of a pizza she had made. "It was one of the best pizzas I've ever had" read the caption. Hm. And gluten free on top of that. Now, being a gluten free eater myself [like my Mama], I was interested to hear about the pizza and more specifically, the crust. Gluten free crust is extremely difficult to perfect, even for those with professional culinary training. There are even restaurants which fail to deliver when it comes to the gluten free crust. 

Well, your jaw will probably drop when I tell you our crust recipe:

Food for Life | Brown Rice Tortillas


Yes, that is the crust recipe. Buy a pack of Food for Life Brown Rice Tortillas from your local Whole Foods or other health food store and stock up on all your favorite pizza toppings. 

Now, you may be as skeptical as I was when my mom first shared that these would make up the pizza crust, but let me tell you what I look for in a pizza crust: the perfect mix of crunchy crispness and squishy softness. I absolutely love thin crust pizzas, and these tortillas definitely deliver. They are the perfect size for everyone to have their own mini pizza and so thin that you hardly feel like you're eating pizza and you certainly don't have to deal with a carb-coma afterward like you do with many other heavy gluten-packed pizza doughs.

SO, are you convinced yet? Well, I'm sharing a few of our favorite toppings and pizza combinations below and I highly recommend you try your own BYOP [Build Your Own Pizza] night at your house, especially if you have kids that actually know what pizza is. Because it is hands on fun that encourages both healthy eating and creativity. Plus it makes for a delicious meal to kick off the week, both easy to make and ever so satisfying.

What You Need //
Food for Life Brown Rice Tortillas // [here]
High quality tomato/marinara sauce // Our favorite is Bobby D's brand: Ma's Angry Sauce [here]
Cheese of your choice // We like grated parmesan and shredded mozzarella
Your favorite toppings: meat, veggies & fruits

Ground Pepper // Crushed Red Pepper // Pizza Stone

What You Do //
Preheat oven to 400 degrees with your pizza stone inside so it warms as oven preheats. 

Once preheated, assemble your pizza by placing a few spoonfuls of sauce onto your tortilla // Be careful not to add too much sauce, as it will make your pizza soggy.

Add your toppings as desired and bake at 400 degrees until cheese is bubbling and brown. We didn't even use a timer, but I would say between 10 and 15 minutes depending on your oven.

Once cheese is browning and edges are crispy, remove pizza carefully onto a wooden cutting board and using a pizza cutter, cut into slices. Add seasoning as desired and enjoy!

Our Favorite Toppings:
Grilled Chicken // Brat Hans Italian Chicken Sausage // Applegate Pepperoni
Mozzarella Cheese // Parmesan Cheese 
Black Olives // Fresh Pineapple // Fresh garlic
Tomatoes // Mushrooms // Onions // Arugula


Our Favorite Combos:
"The Mama" // Mushrooms & Sliced Tomatoes with Arugula added as soon as it comes out of the oven

"The Hubby" // Caramelized onions & mushrooms, sausage or pepperoni and parmesan cheese

"The Pup" [my favorite] // Grilled chicken, mushrooms, fresh pineapple & a mix of parm+mozzarella cheese, topped with lots of freshly ground black pepper

>> Ever since I was a little girl, my dad's nickname for me has been Pup. I don't know where it originated but even 24 years later, it has stuck <<

Other Classic Combinations:
Classic Margherita: Tomato Sauce, Fresh Mozzarella & Basil
Supreme: Sausage, Pepperoni & Onions, Mushrooms & Black Olives
Hawaiian: Canadian Bacon & Pineapple
The Cowboy: Pepperoni, Sausage, Black Olives & Mushrooms
Classic Cheese: Cheese, cheese & more cheese.

Two Tips:

Be sure to use a pizza stone for baking your pizza // I think that is a huge contributor to achieving a crisp crust [see a few here] and it must be placed in your oven as the oven is preheating!

Don't put too much sauce or too many toppings on your pizza, it will weigh your tortilla down, and as you'll be able to see, the tortillas are super thin [which is what I love]. With too many toppings, you'll probably end up with more of a soggy mess than a tasty dinner.

Overall, I would say this is by far the best homemade pizza I've ever had, easily the best gluten free pizza I've ever had and in general, some of the most satisfying pizza I've ever had, even when I consider every pizza from every restaurant I've ever eaten. Why? I felt great eating it, so satisfied and still so slim. Not only that, but I didn't have to deal with the aftermath of too much any gluten. 

I can't wait to try new pizzas every few weeks and start making them with Olivia as she gets a little older. A great way to spend a date night in would be to make homemade pizzas with your husband after your babe has gone to sleep. Put some music on in the kitchen, prepare the toppings together and then take turns sharing each other's creations!

Bottom line -- have fun and play around. 
Get to know your oven and your crust+topping preferences and make adjustments as needed. 
I hope you find this as easy and satisfying as I did. And if you do, I'd love to hear from you!

6.01.2022

strawberry rhubarb crisp [gf]

I'm officially calling this summer the summer of crisps. My goal is to try new crisp & crumble recipes every few weeks with lots of different fruit as it comes into season. Blueberries, raspberries, peaches & more strawberry + rhubarb crisps are on the horizon and I will be testing all different topping recipes incorporating coconut as well various nuts and seeds, and sharing them all here. 

Today's crisp is the classic Strawberry & Rhubarb, using rhubarb fresh from the Farmer's Market and strawberries from a local strawberry farm. Top with a generous scoop of vanilla icecream and you're pretty much in summer dessert heaven. 


What You Need //

Filling:
3 Tbsp. cornstarch
1 cup sugar
1 tsp. lemon zest
3 cups sliced fresh strawberries
4 cups thinly sliced & diced rhubarb

Topping:
1 cup high quality gluten-free flour
1 cup packed brown sugar
½ cup salted butter, cold
1 1/4 cup gluten-free rolled oats

Food Processor
9x13 glass baking dish


What You Do //

1. Preheat oven to 375°. Spray a glass or ceramic 9×13 baking dish with cooking spray or coat lightly with butter.

2. In a large bowl, whisk together the sugar and cornstarch.

3. Add the lemon zest, sliced strawberries and rhubarb and stir together with a spatula until fruit is all coated with sugar mixture.

4. Spread the fruit mixture into the 9×13 baking dish.

5. Cut the cold butter into cubes. 

6. Measure the flour, brown sugar and oats into a food processor: pulse together the flour, brown sugar and butter until butter is in pea-sized pieces and then add oats until just mixed [I mix oats in by hand].

7. Crumble oat mixture on top of the fruit mixture. 

8. Bake 45 minutes in a 375° oven, or until lightly browned and crisp.


Enjoy!

Back to Top